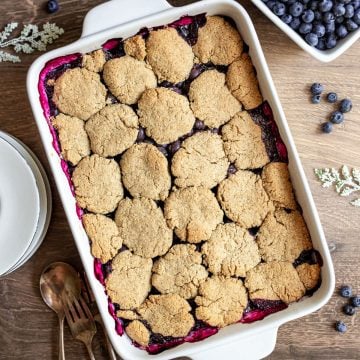
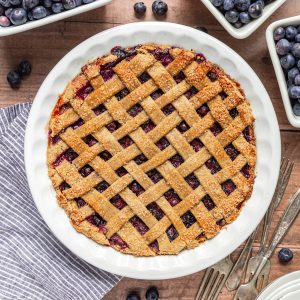
This gluten-free and vegan blueberry pie is a healthy version of the classic summer recipe. With an oat flour crust that creates a beautiful lattice top, and a super quick blueberry filling, this pie is an easy and delicious vegan dessert.
A stunningly beautiful and EASY blueberry pie. That's gluten-free and vegan. And tastes delicious!
A whole food plant-based pie recipe might seem complicated, but the recipe itself is surprisingly easy.
Blueberry filling is easy to make because blueberries don't require any prep or chopping.
The gluten free crust is a dough that is made with just a few simple ingredients, doesn't require any refrigeration, and is very easy to handle.
Jump to:
- Why this recipe works
- Why I love this Gluten Free Vegan Blueberry Pie
- Ingredient Notes & Substitutions
- How to make Gluten Free Vegan Blueberry Pie
- Serving Suggestions
- Tips for the best Vegan Blueberry Pie
- FAQ & Expert Tips
- Recommended Tools
- Recipe Prayer
- More Gluten-Free Vegan Pies
- More fruit crisps, crumbles, & cobblers
- Tried this recipe?
- 📖 Recipe
- 💬 Comments
Why this recipe works
Filling: Mashing the blueberries helps release some of their liquid, which binds with cornstarch to create a solid, sturdy filling. Maple syrup adds sweetness and lemon juice creates a fresh zing.
Crust: The most important ingredient in the oat flour crust is water. Water brings the dough together so it is workable and not too sticky.
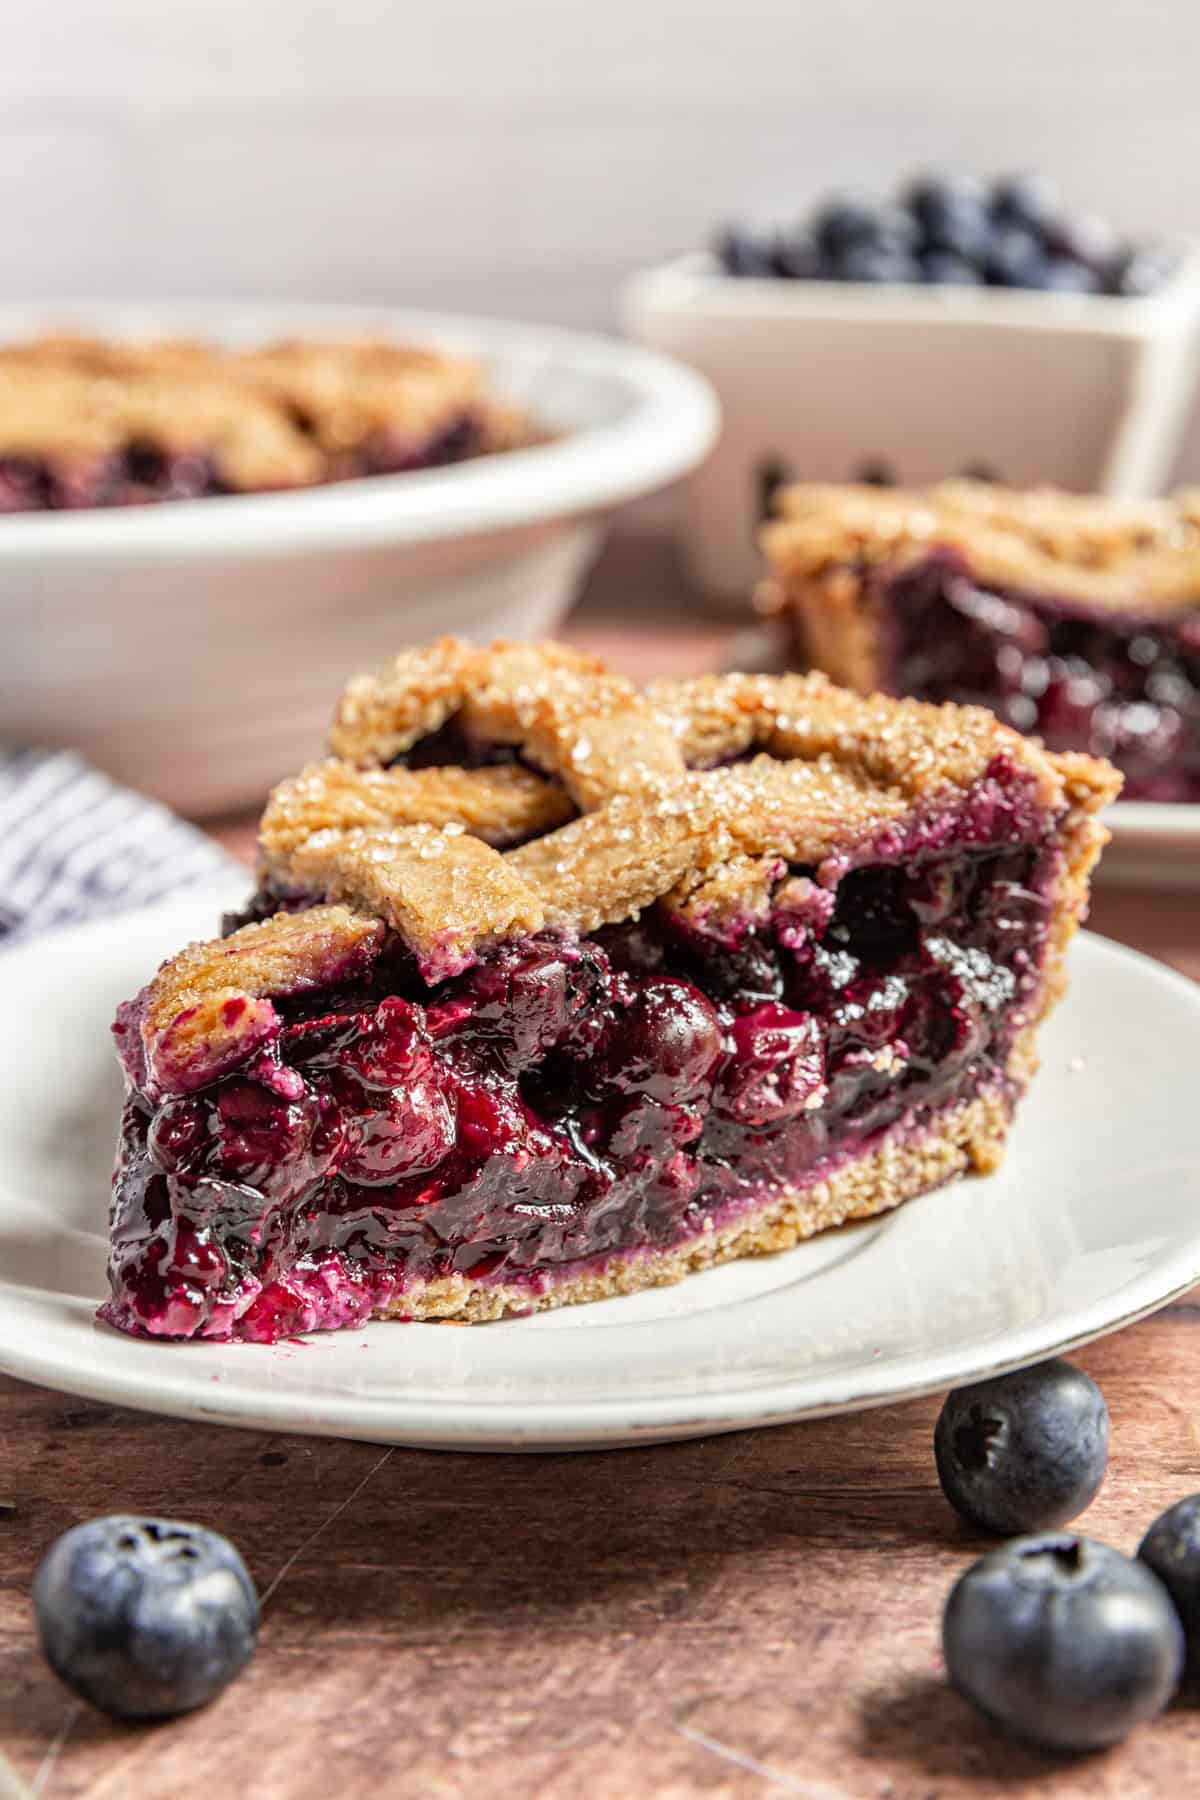
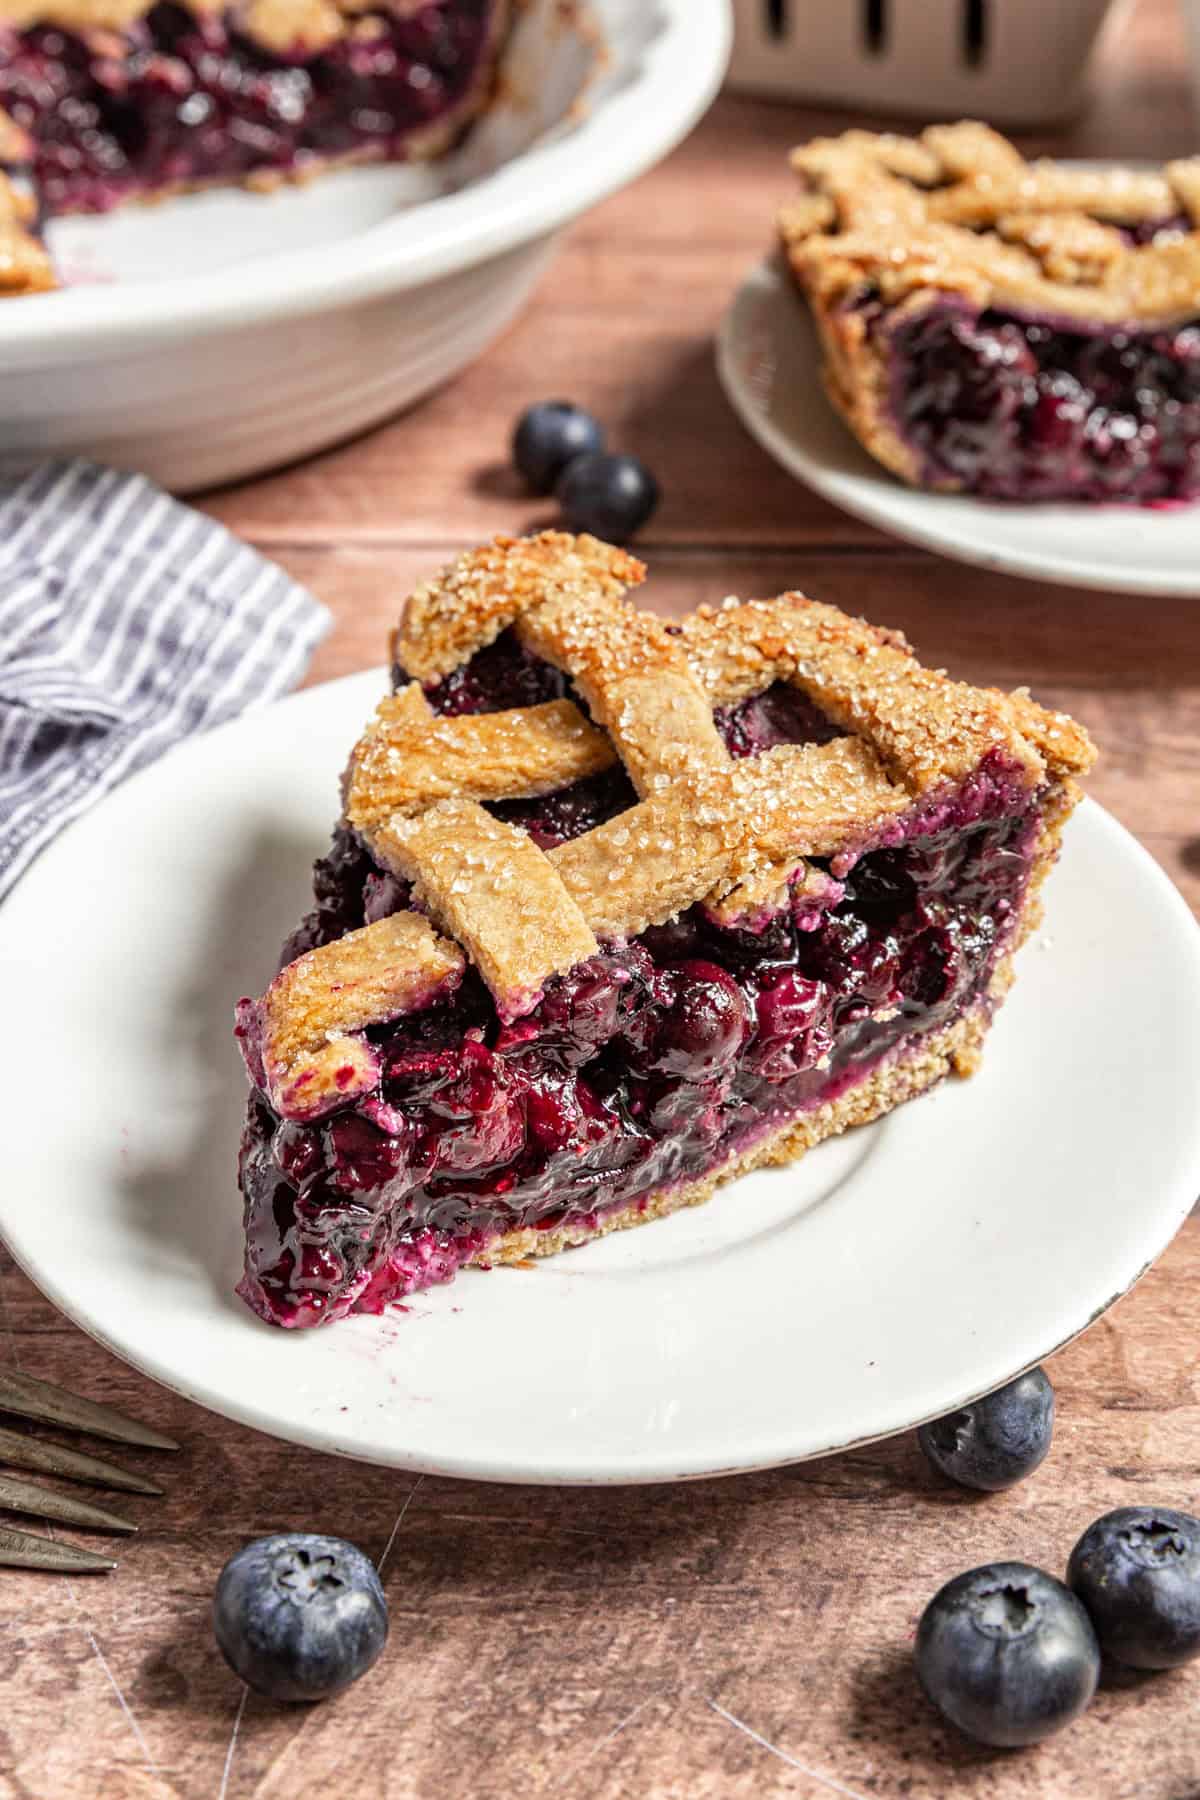
Patience: Yep. The one thing that really makes this pie work is patience. The pie must cool completely so the filling can set. If you cut the pie too soon, the filling will be runny and spill all over the place. But a cooled pie results in neat, even slices!
Why I love this Gluten Free Vegan Blueberry Pie
- Dietary needs - this pie is vegan, eggless, gluten-free, dairy-free, oil-free, and refined sugar free. That's right! No vegan butter, no white flour, no sugar, AND made with whole foods.
- Seven ingredient filling - blueberry pie filling is SO easy. You don't have to do any chopping or pitting to get the blueberries ready. Just dump and mix.
- Easy gluten free pie crust that works just like a regular crust. - For the longest time I thought it would be impossible to create a pie crust that acts like a store bought crust that uses butter and sugar. Turns out, I was wrong. The secret ingredient, water, is the key to getting a workable crust.
- Blueberries are the star - my favorite thing about fruit pies, crumbles, cobblers, and crisps is that the fruit is the star! The flavors you enjoy in a regular blueberry pie are still present in this vegan and gluten free version
- Great for making ahead of time - for best results, the pie should cool completely. So this pie is perfect to make the day before you want to serve it
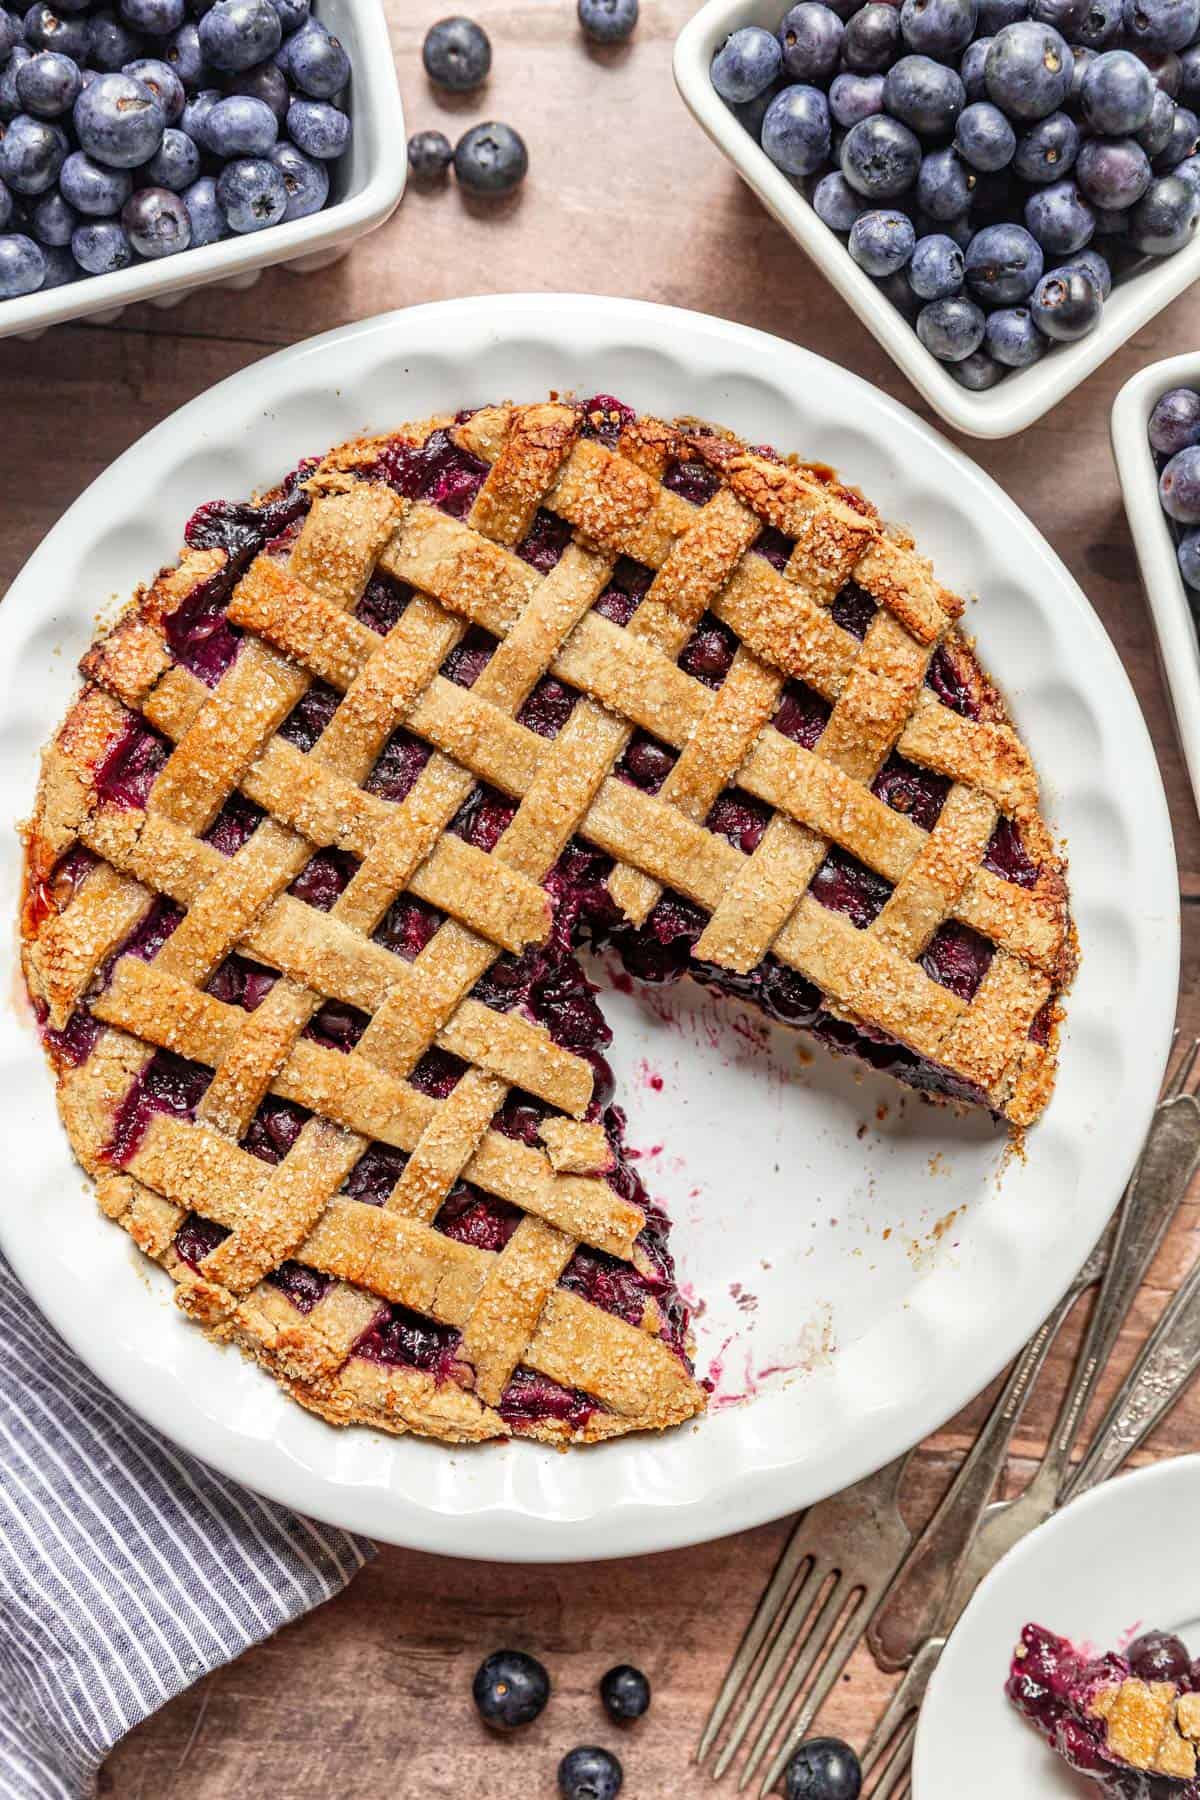
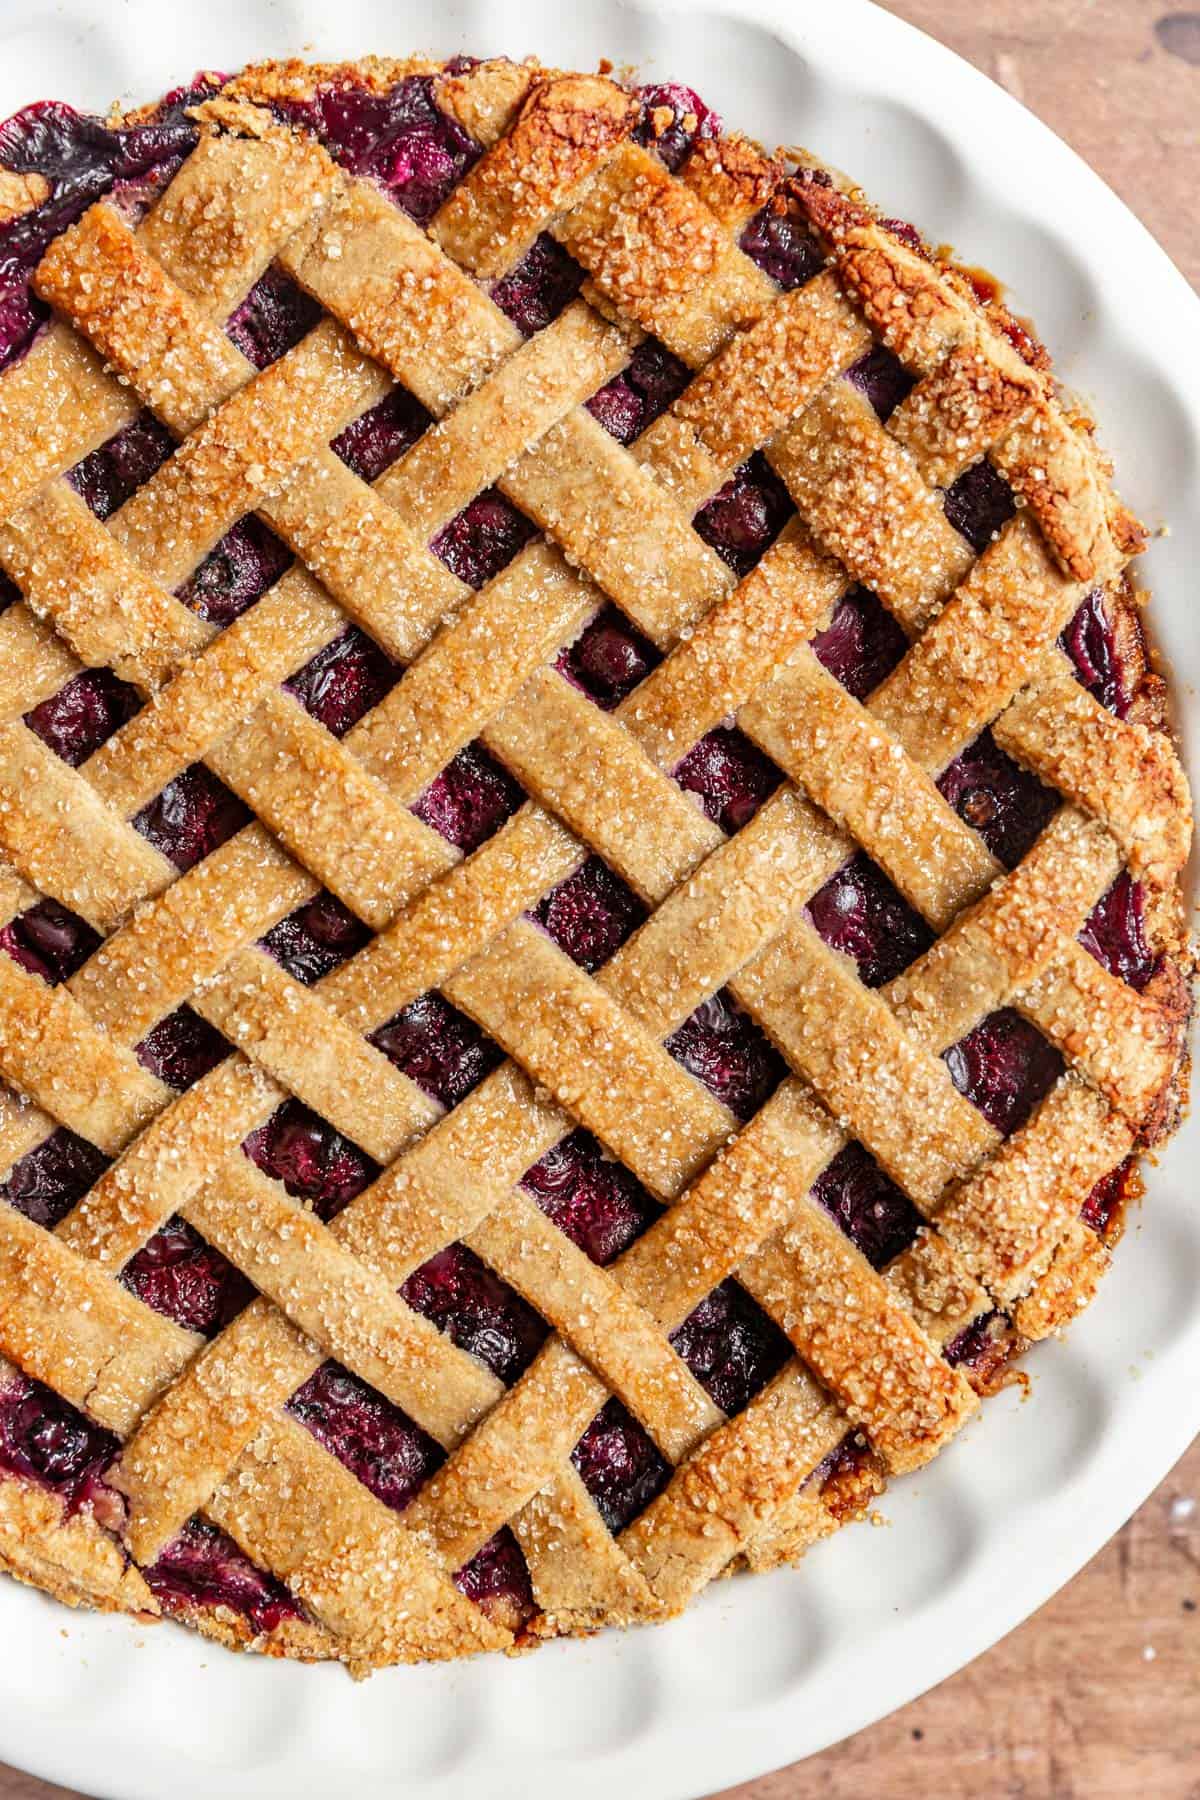
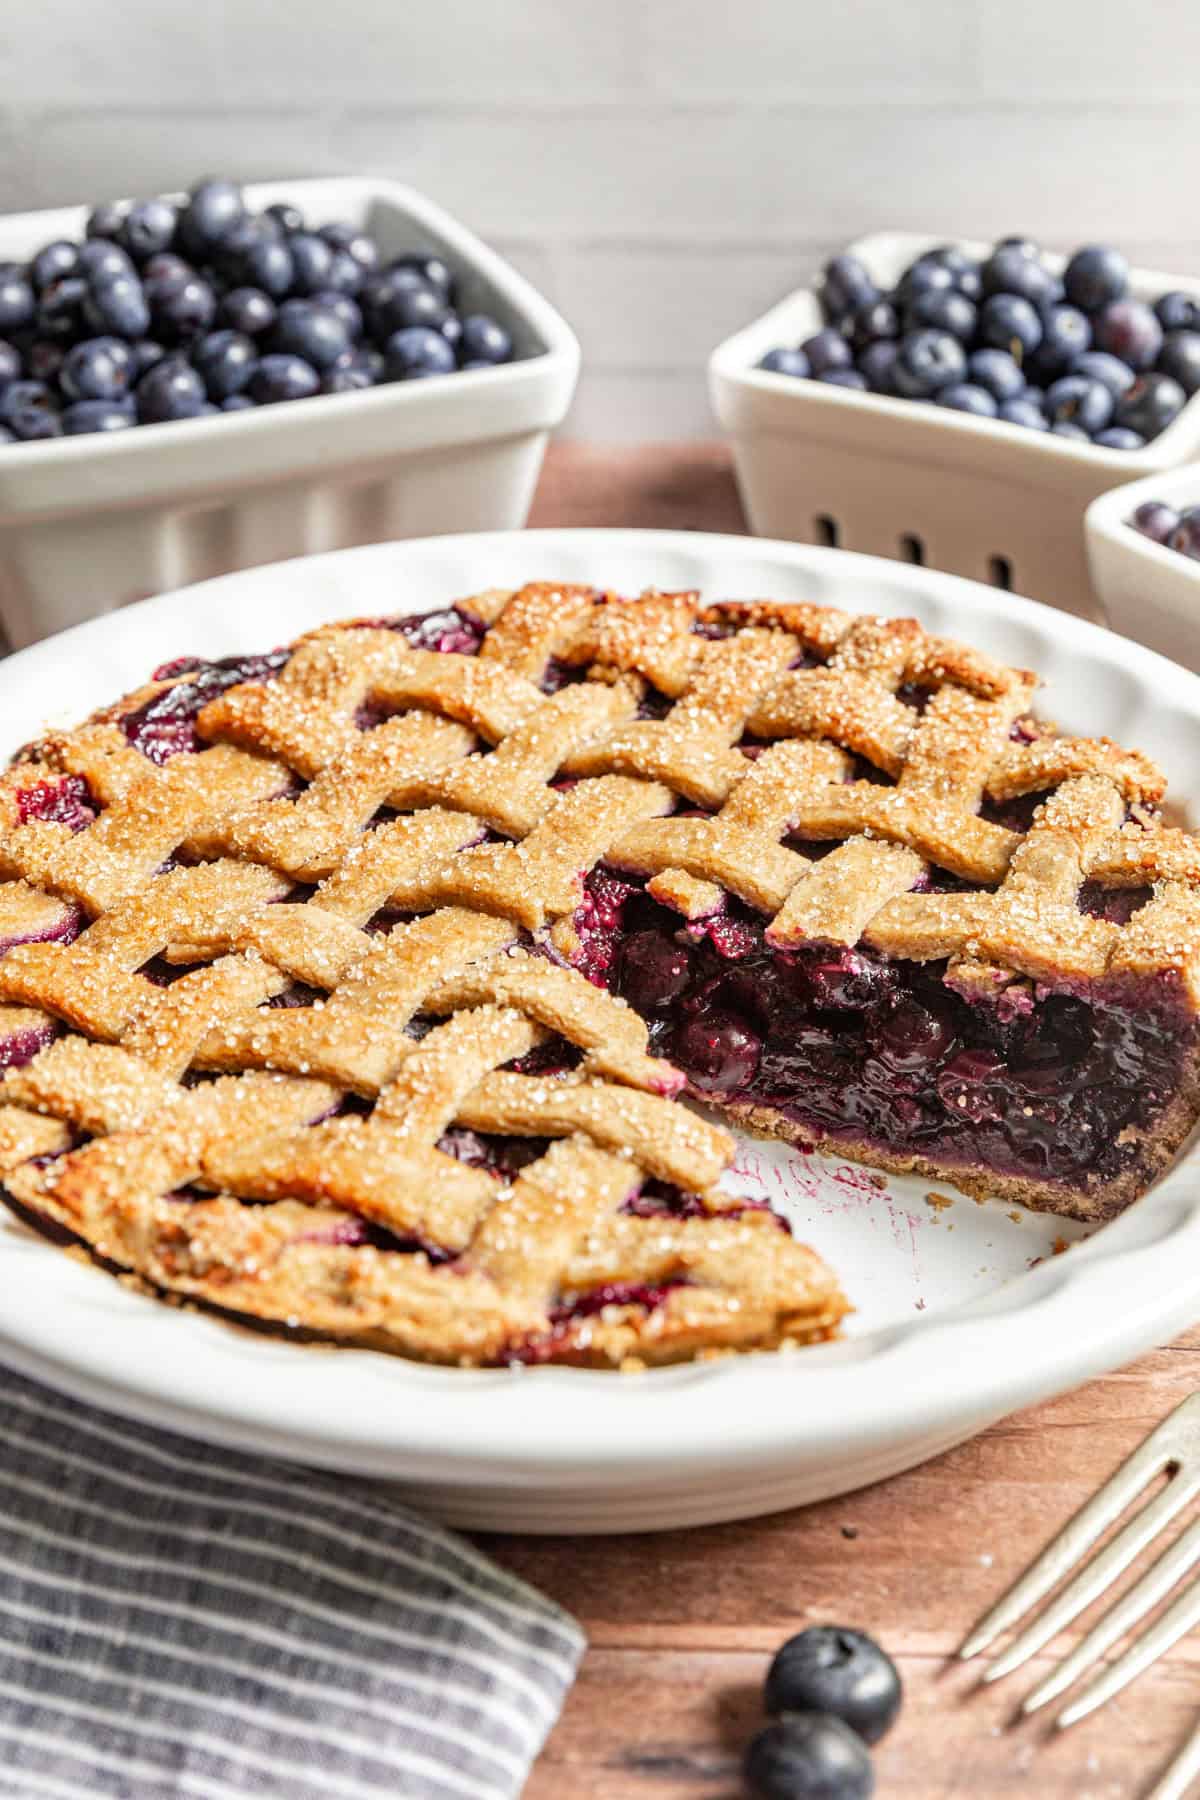
- Really pretty - the lattice topping turns this pie from "nice" to "beautiful" - and don't worry, the lattice is not hard to make!
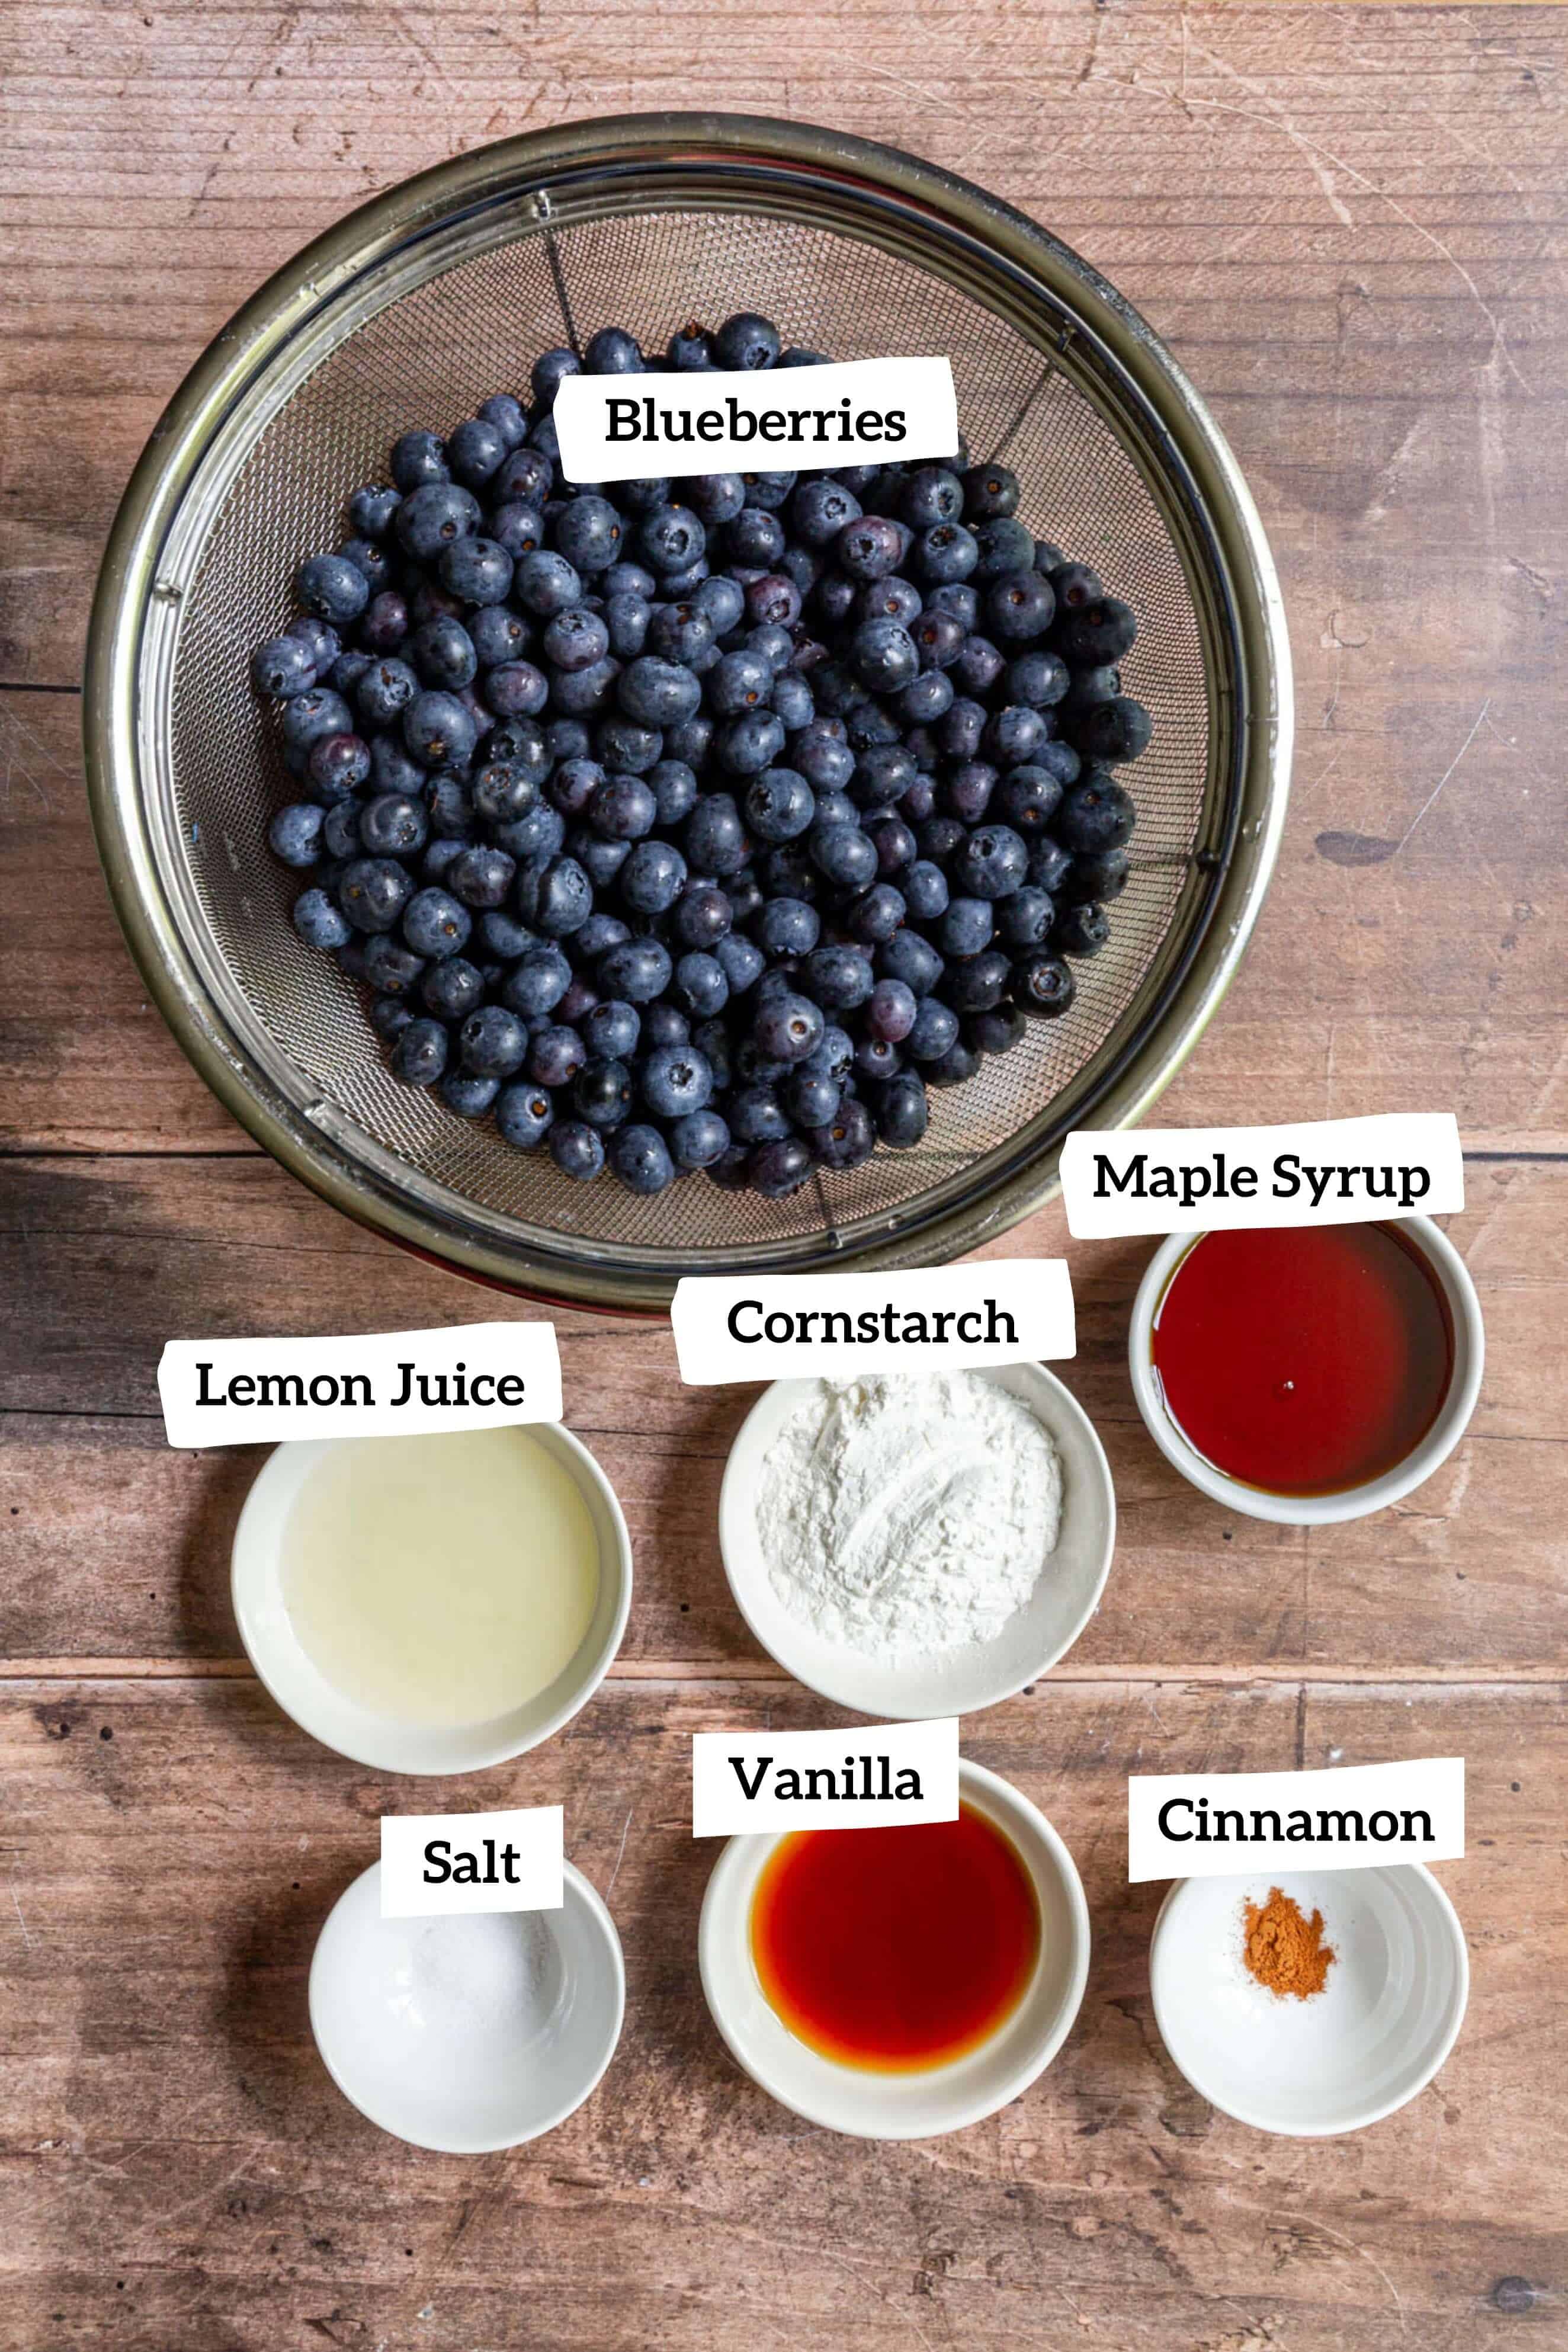
Ingredient Notes & Substitutions
Crust & Lattice Top Ingredients
- Oat Flour: sometimes I recommend using homemade oat flour in my baked good recipes. I don't recommend it for this pie crust - you want a fine flour to create a smooth and sturdy dough - so, opt for store bought. That said, homemade oat flour will still work, the crust will just have a coarser texture
- Salt: be sure to use fine table salt
- Nut Butter: This is the fat source that is replacing the butter (or vegan butter) you would find in a traditional pie crust. I use cashew butter because it has the most neutral tasting flavor. You can also use almond butter.
- Maple Syrup: a pie crust needs a bit of sweetness, so instead of sugar we'll use maple syrup. I don't recommend substituting date syrup in this crust, or else the dough will be too sticky
- Water: water brings the dough together. Cold water is ideal, but room temperature water is fine.

Filling Ingredients
- Fresh Blueberries: I highly recommend using fresh blueberries instead of frozen. If you do use frozen, thaw the berries at room temperature and expect to add 5-10 minutes to the baking time (you want to see the fruit bubbling in the oven)
- Maple Syrup: blueberries are naturally very sweet, so we only need a bit of syrup to create a nice sweet filling. Don't skip the syrup entirely though, because the liquid from the syrup mixes with the cornstarch to create a nice thick and sturdy filling
- Lemon Juice: fresh lemon juice adds a bite of acid to the dish to create a layer of flavor and zing to the blueberry filling
- Vanilla Extract
- Cornstarch/Arrowroot: cornstarch or arrowroot powder help to thicken up the fruit layer. Arrowroot powder and cornstarch are interchangeable, so use whatever you have.
- Salt
- Cinnamon: this filling has just a hint of cinnamon flavor. If you like a stronger cinnamon flavor, feel free to double the cinnamon
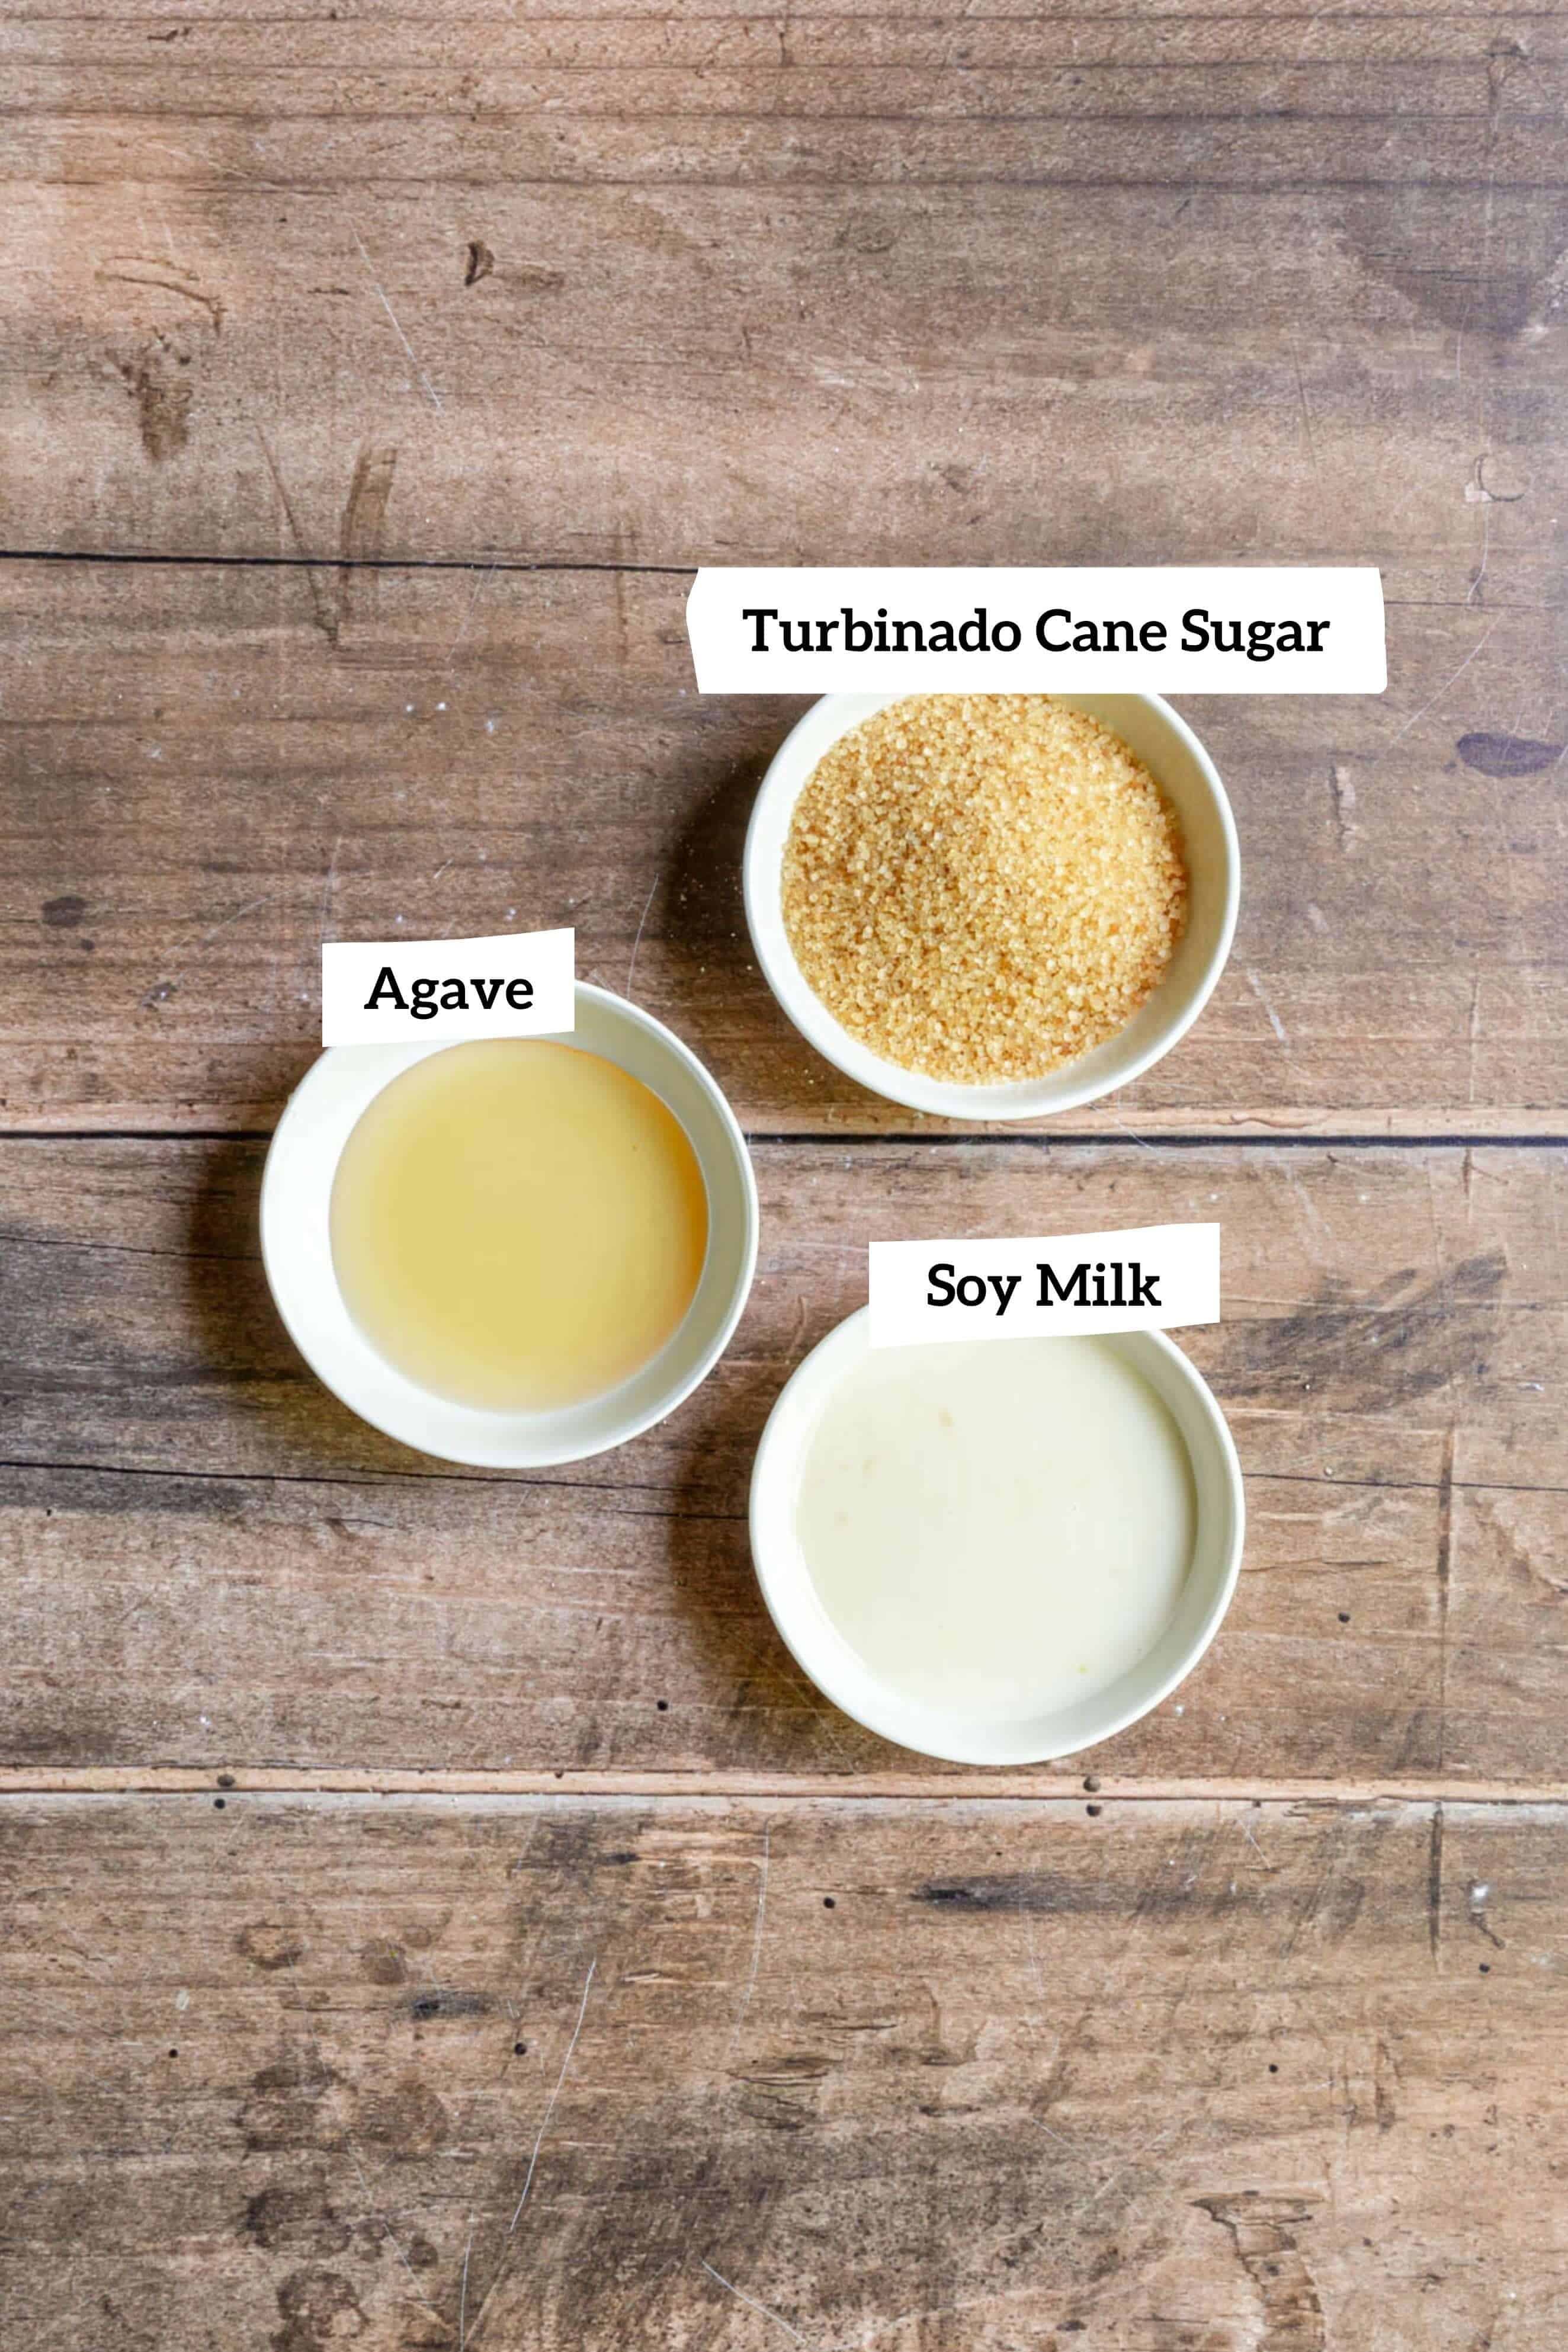
Topping Ingredients
- Soy Milk + Agave: the mixture of soy milk and agave creates a vegan egg wash, which allows the crust to turn golden and develop a nice shine. I have tried this egg wash with maple syrup and it is okay, but agave works best. Soy milk is necessary because of the protein, so don't use a different non-dairy milk.
- Turbinado Cane Sugar: a bit of coarse sugar to sprinkle on top adds a nice touch to the crust. To keep this pie refined sugar free, omit the sugar. (The sugar does not affect how the crust bakes.)
How to make Gluten Free Vegan Blueberry Pie
Step 1. Preheat the oven to 350°F.
Step 2. Make the crust. In a large bowl whisk together the oat flour and salt. Add the nut butter and maple syrup and use a fork to incorporate. Add the water and mix until a dough forms.

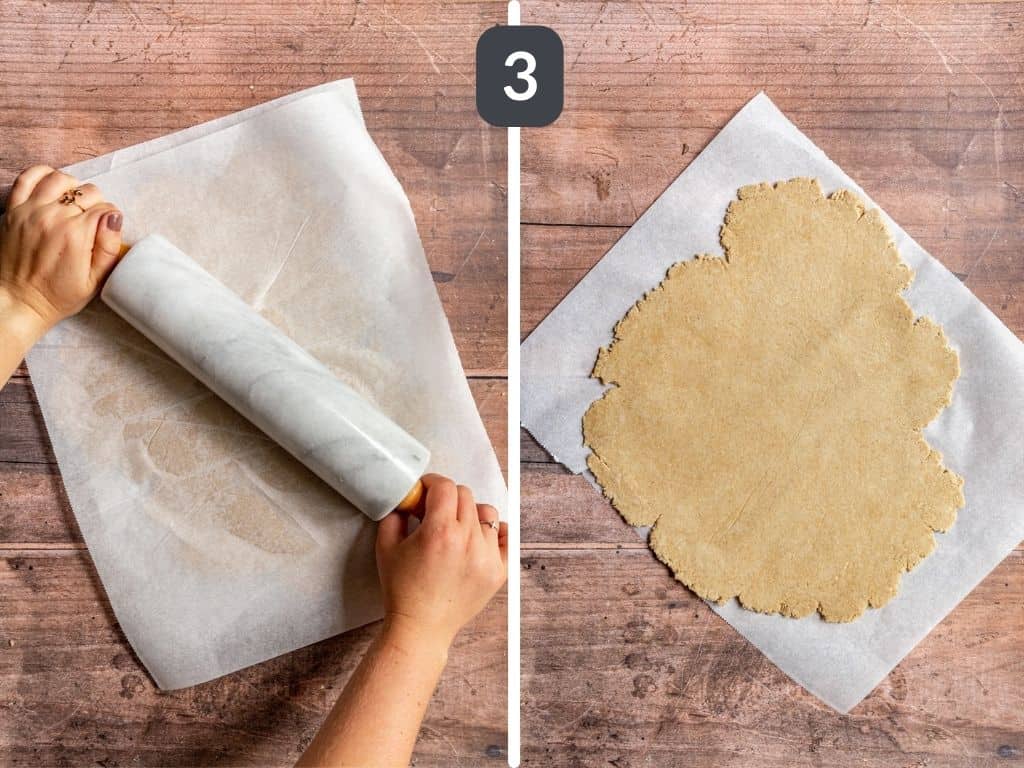
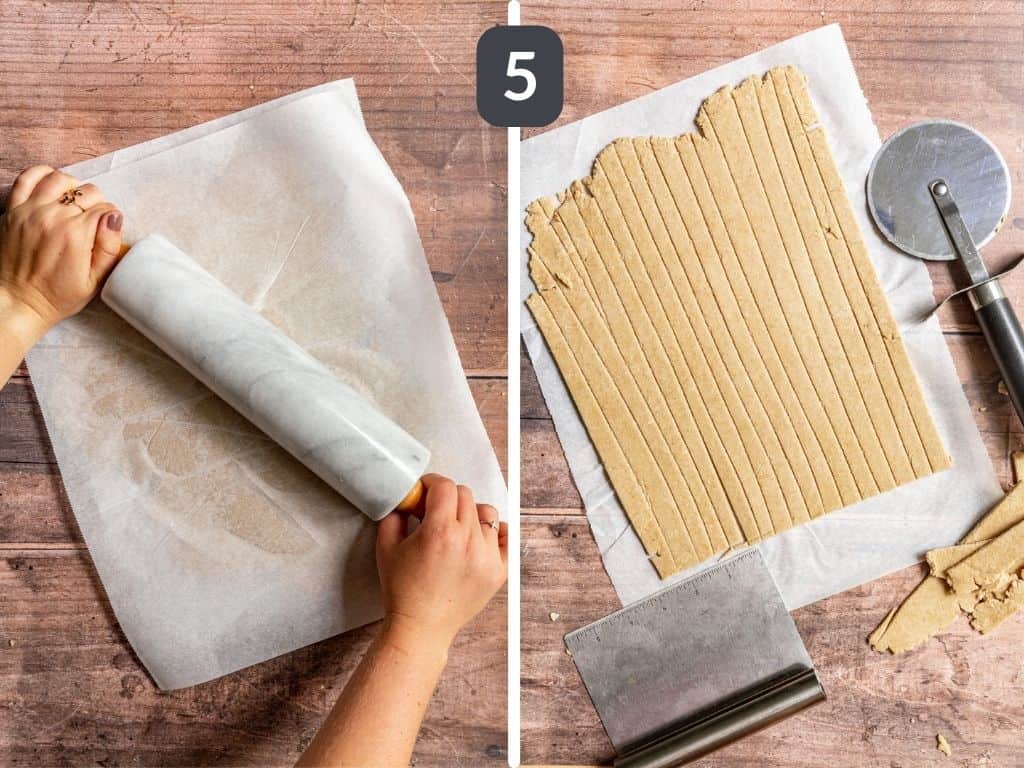
Step 3. Divide the dough in half. Place the first half of the dough between two sheets of parchment paper and roll to approximately 12" wide.
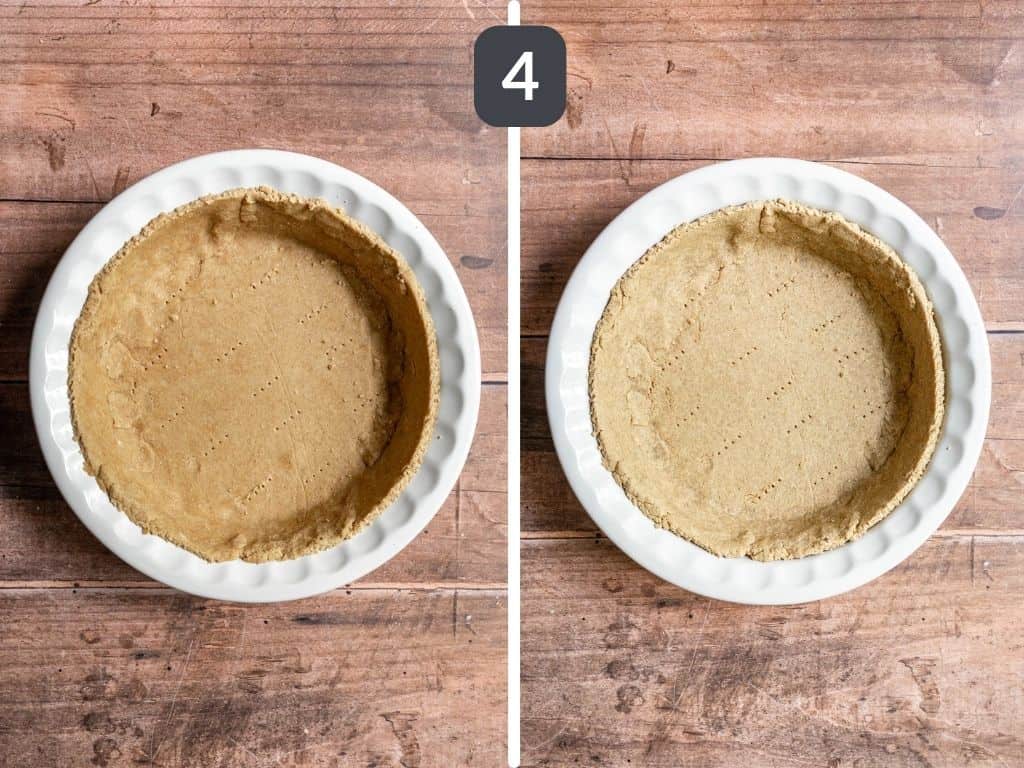
Step 4. Place the dough into into a 9" deep dish pie pan. Use a knife to trim the edges straight and use any extra dough to cover any open spots. Prick several times with a fork, then bake for 10-12 minutes.
Step 5. Take the other half of the dough and place it between two sheets of parchment paper. Roll to approximately 12" wide. Then using a sharp knife or pizza dough cutter, slice into ½" long strips.
Step 6. Shape the strips into a 10"-11" lattice, with the open spaces approximately ½" apart. Press down gently on the places where the crust overlaps to seal the layers together. Set aside.

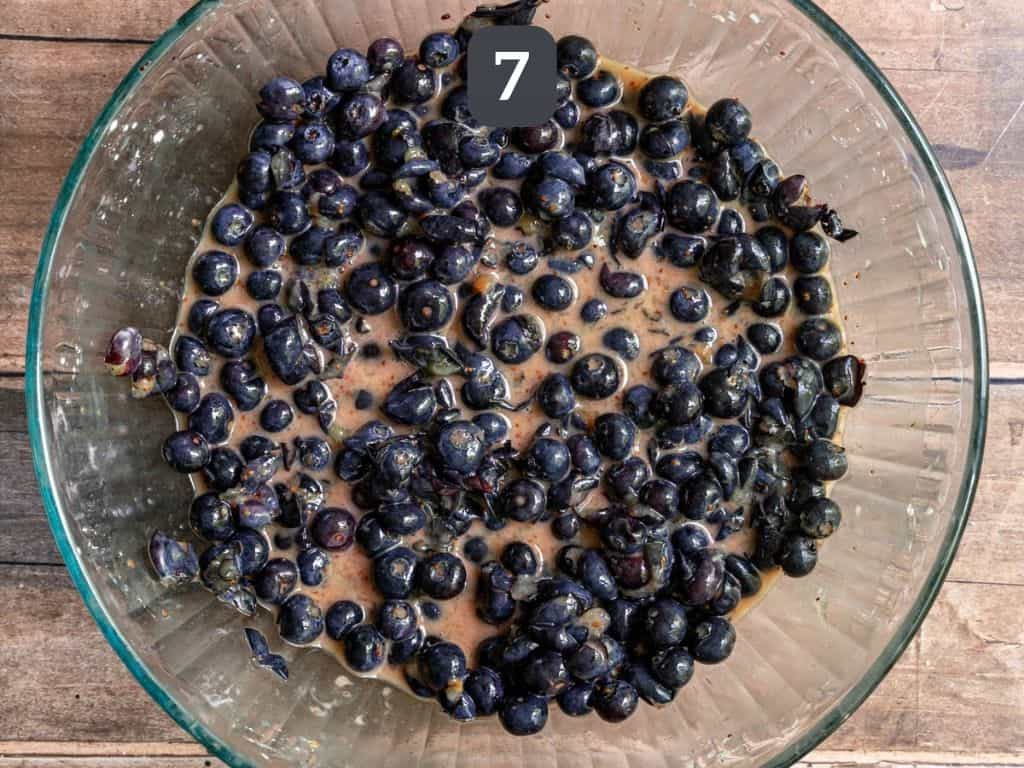
Step 7. Mix the filling. In a large bowl toss the filling ingredients. Use a fork or the back of a spoon to mash the blueberries until about half of them are burst. The mixture should look quite soupy.
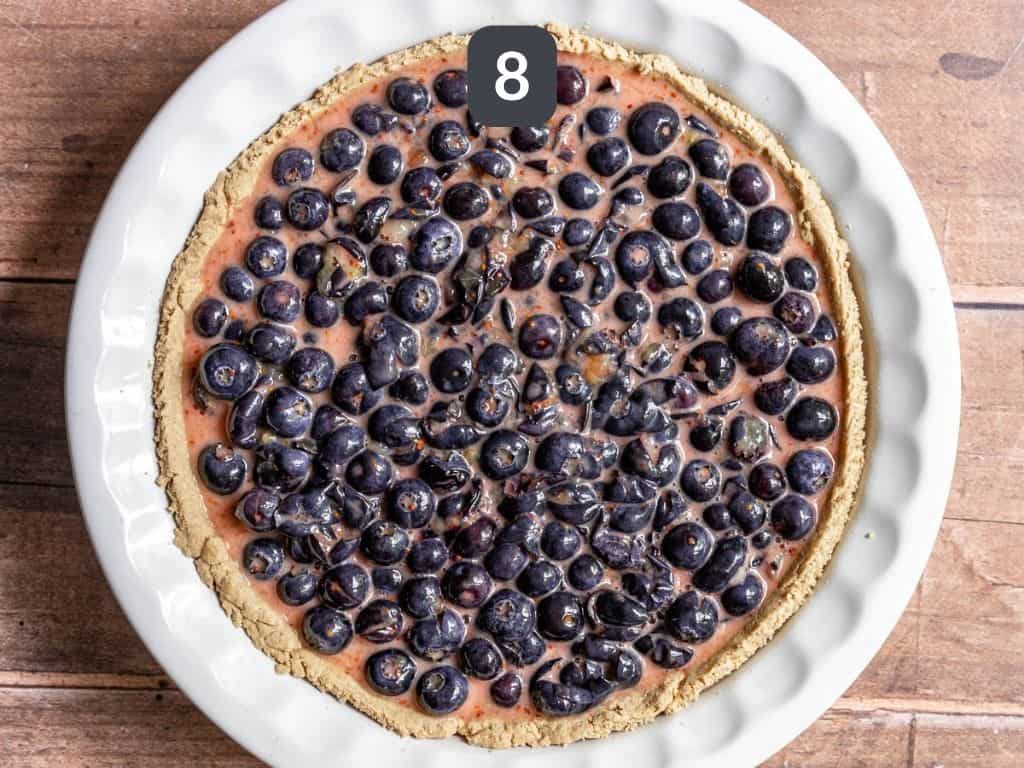
Step 8. Pour the filling into the baked crust.
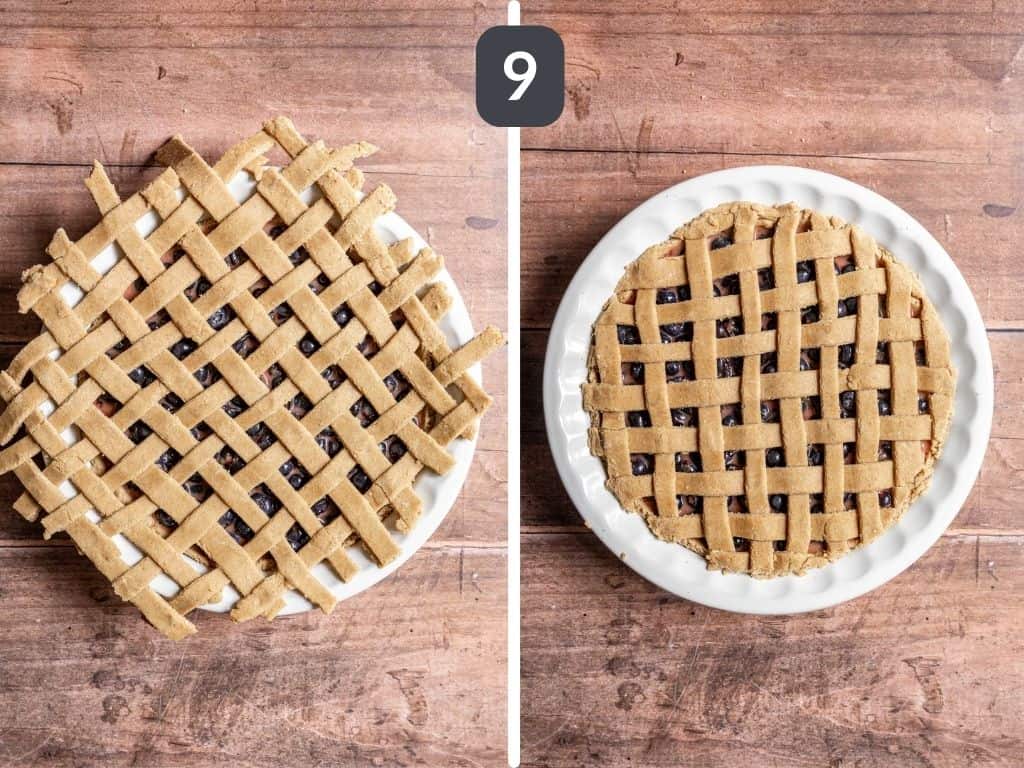
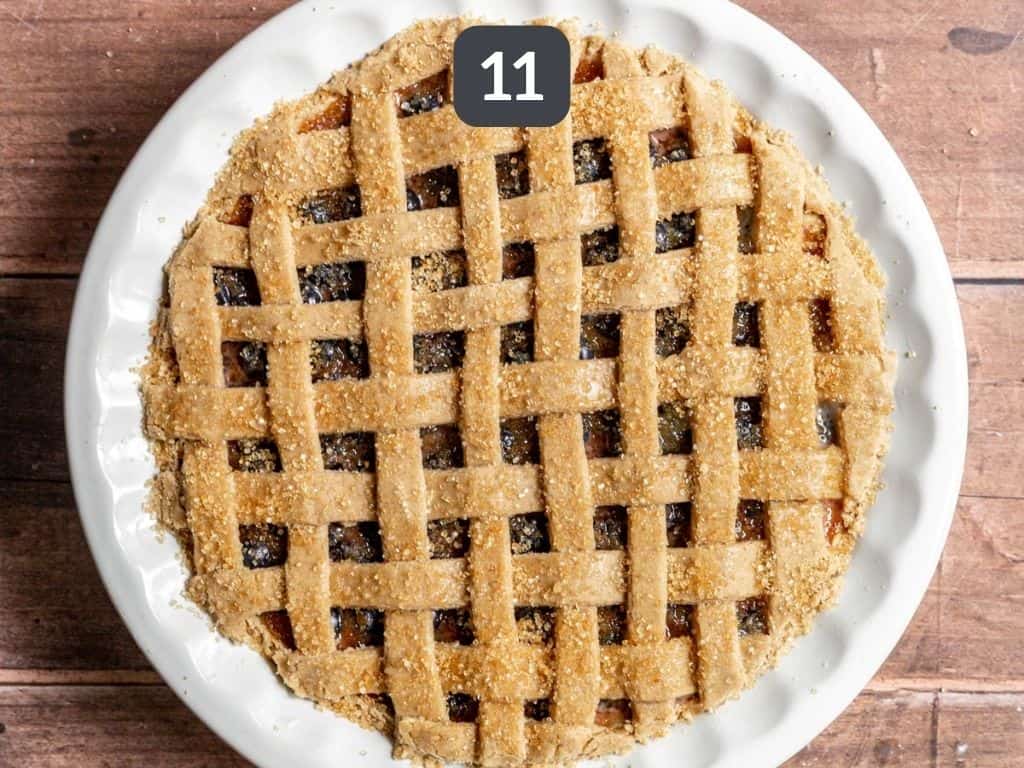
Step 9. Transfer the lattice to the top of the pie. Press the edges down to meet the crust. Then use a knife to trim off the edges.
Step 10. Make an egg wash by mixing the agave and soy milk.
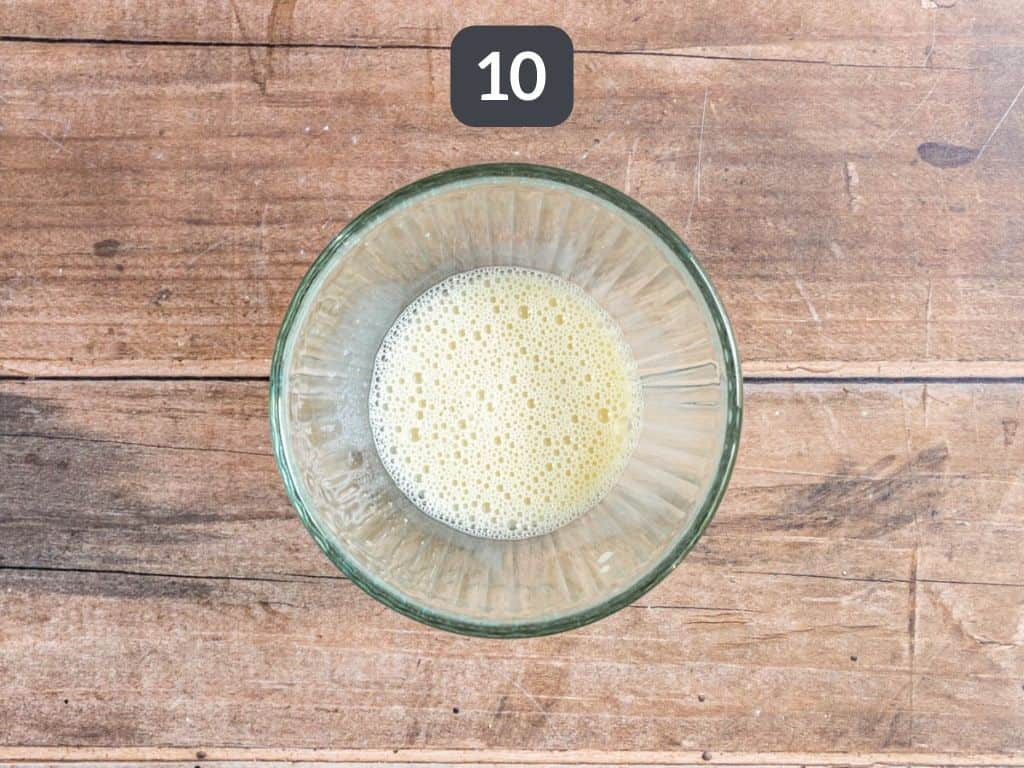
Step 11. Brush the top of the pie with the egg wash then sprinkle generously with the turbinado sugar (optional).
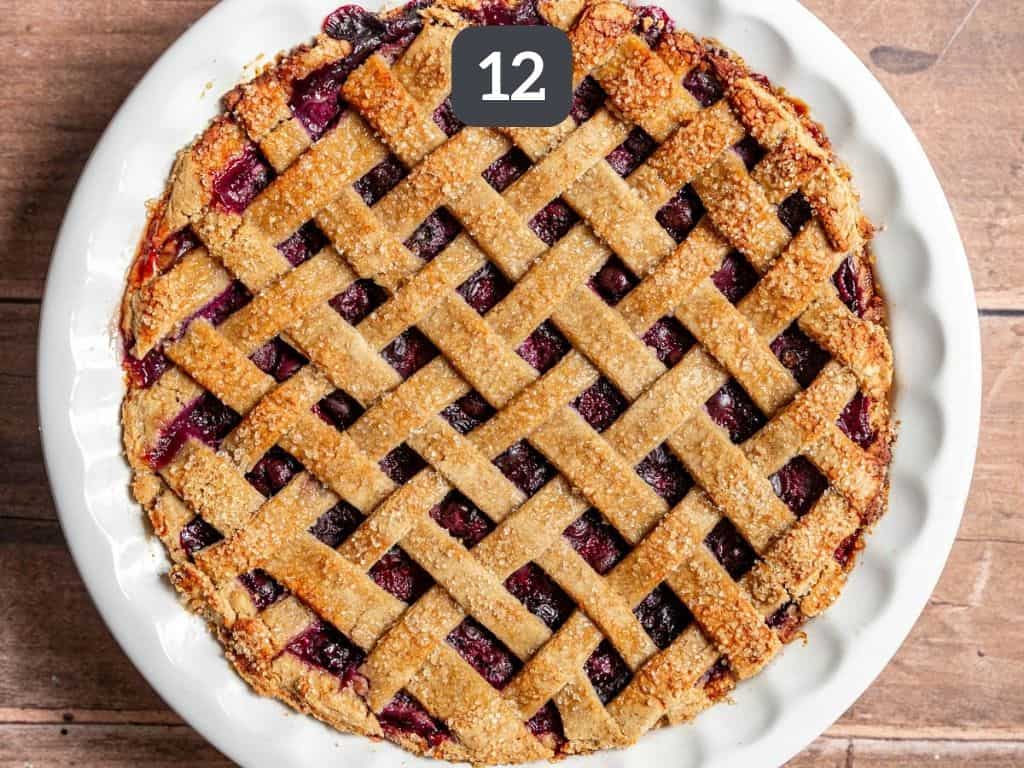
Step 12. Bake for 50-60 minutes until the topping is golden and the inside is starting to bubble. Remove from the oven and let cool completely.
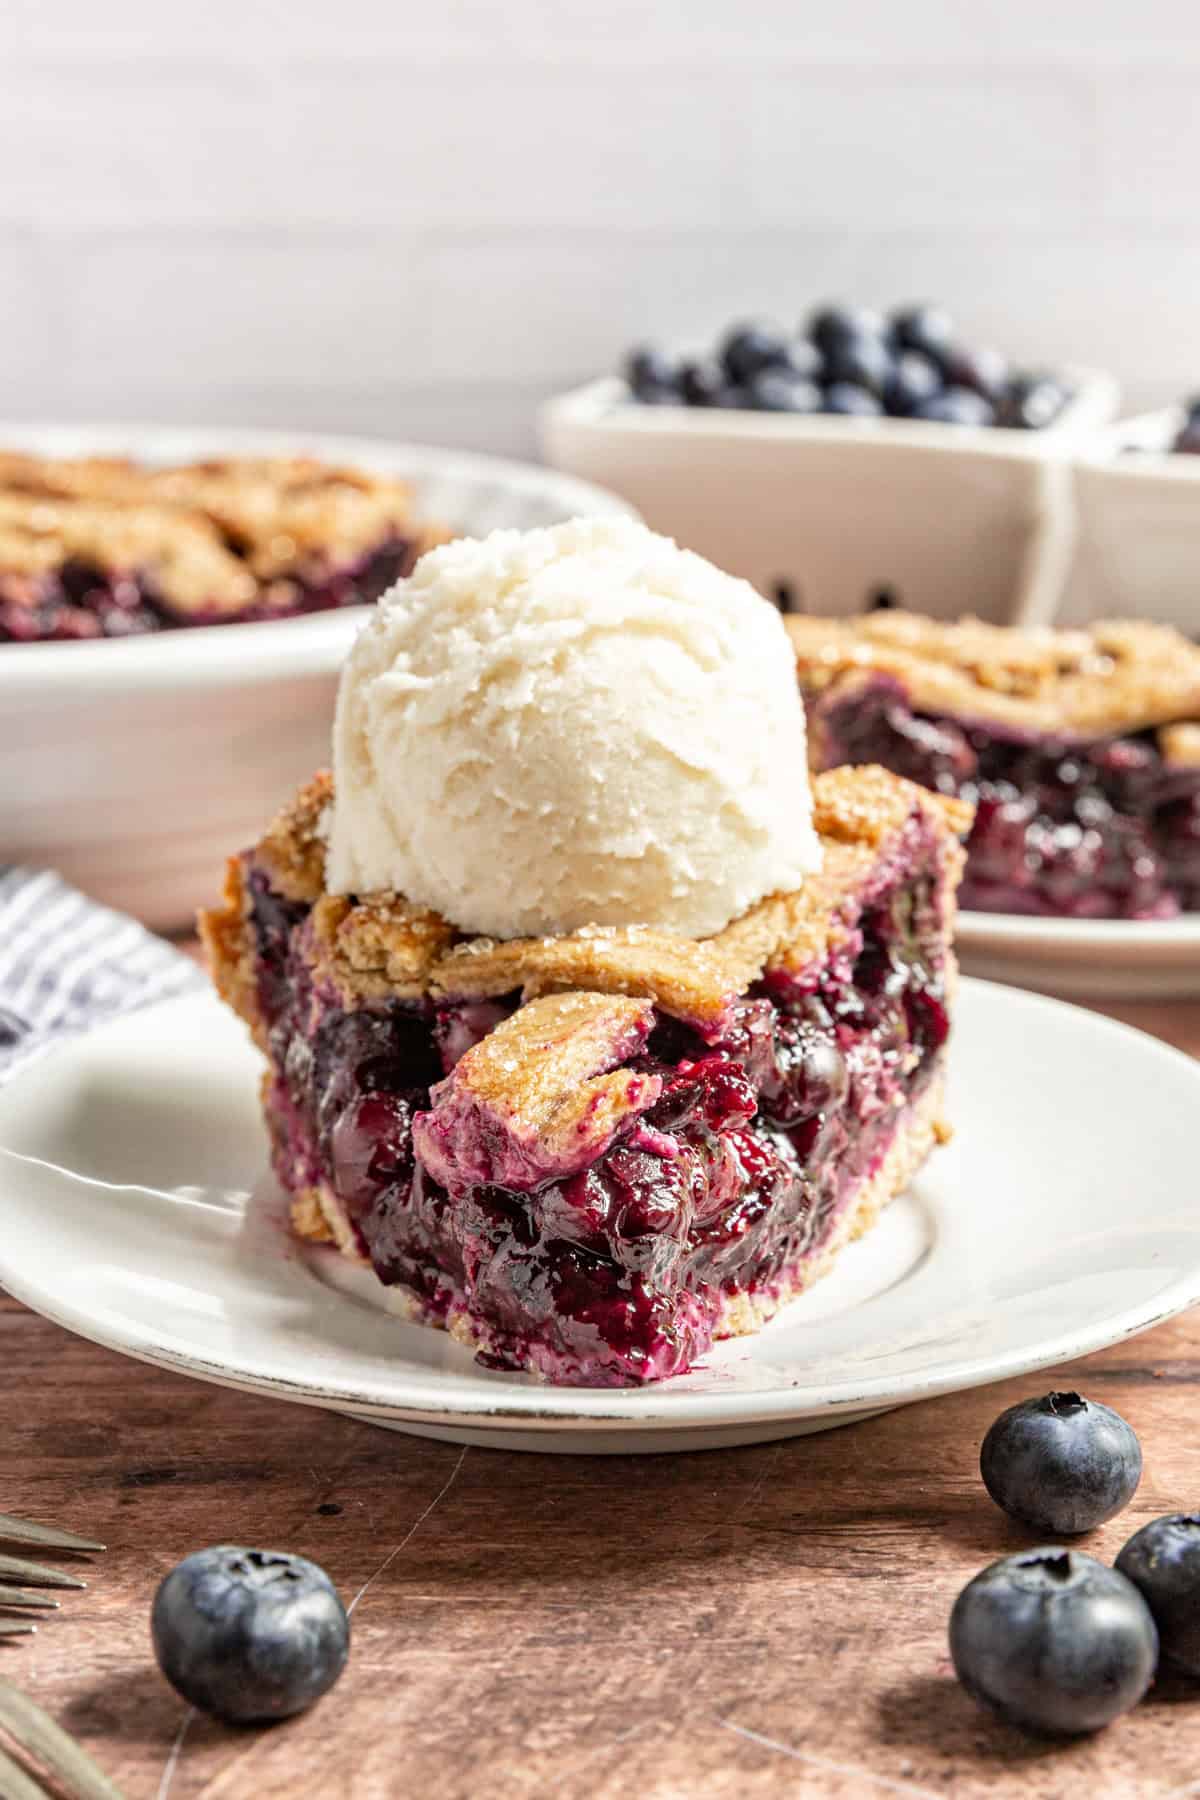
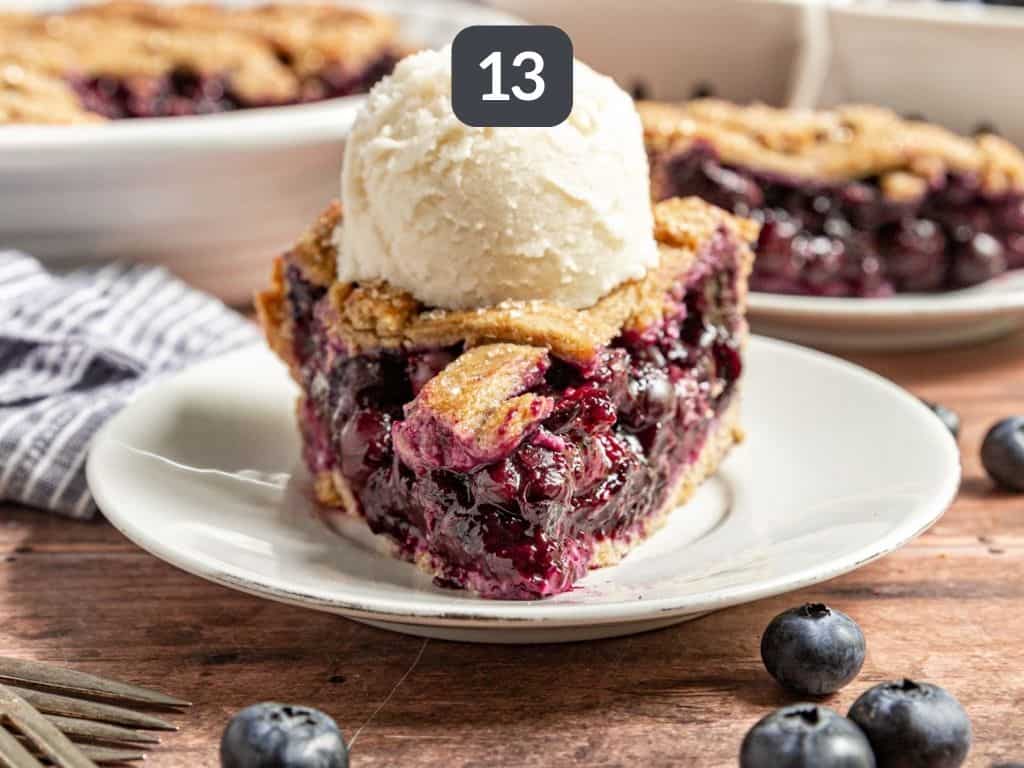
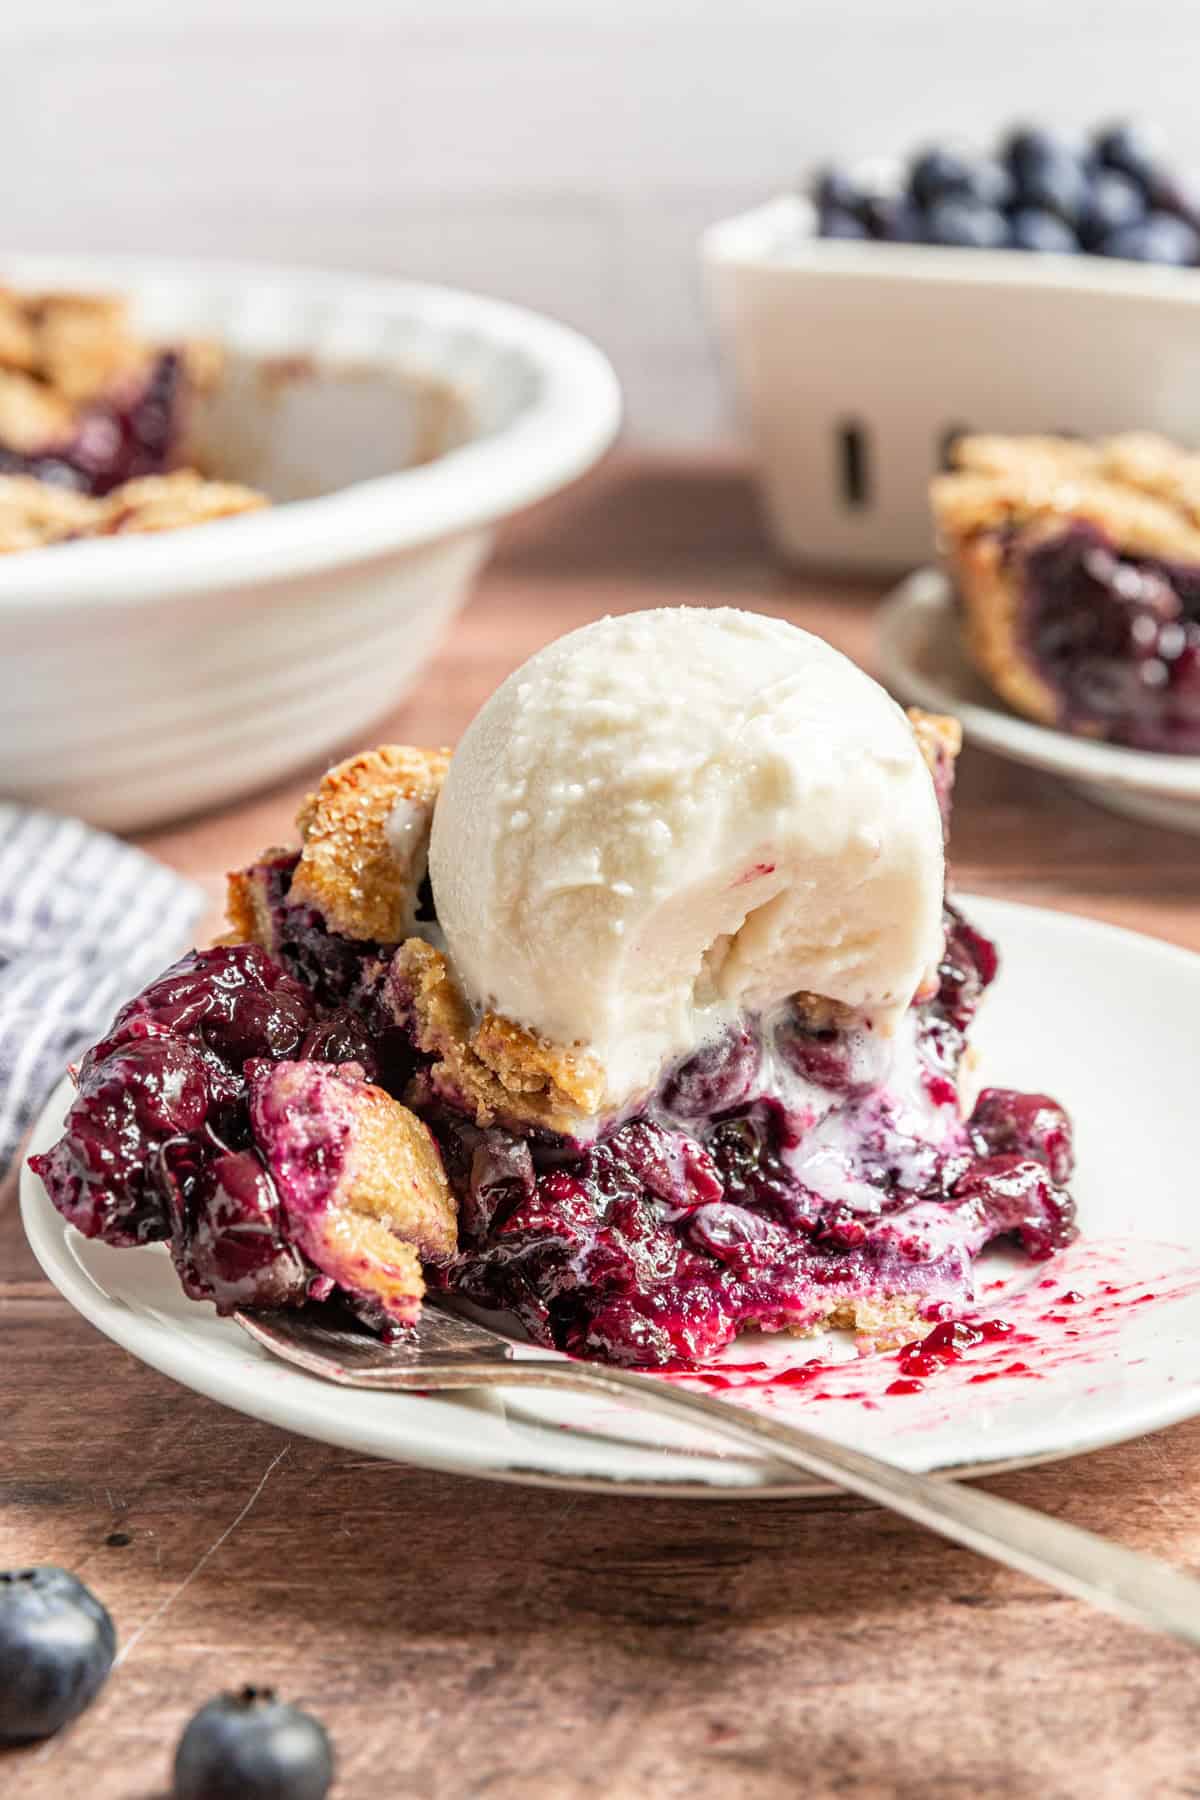
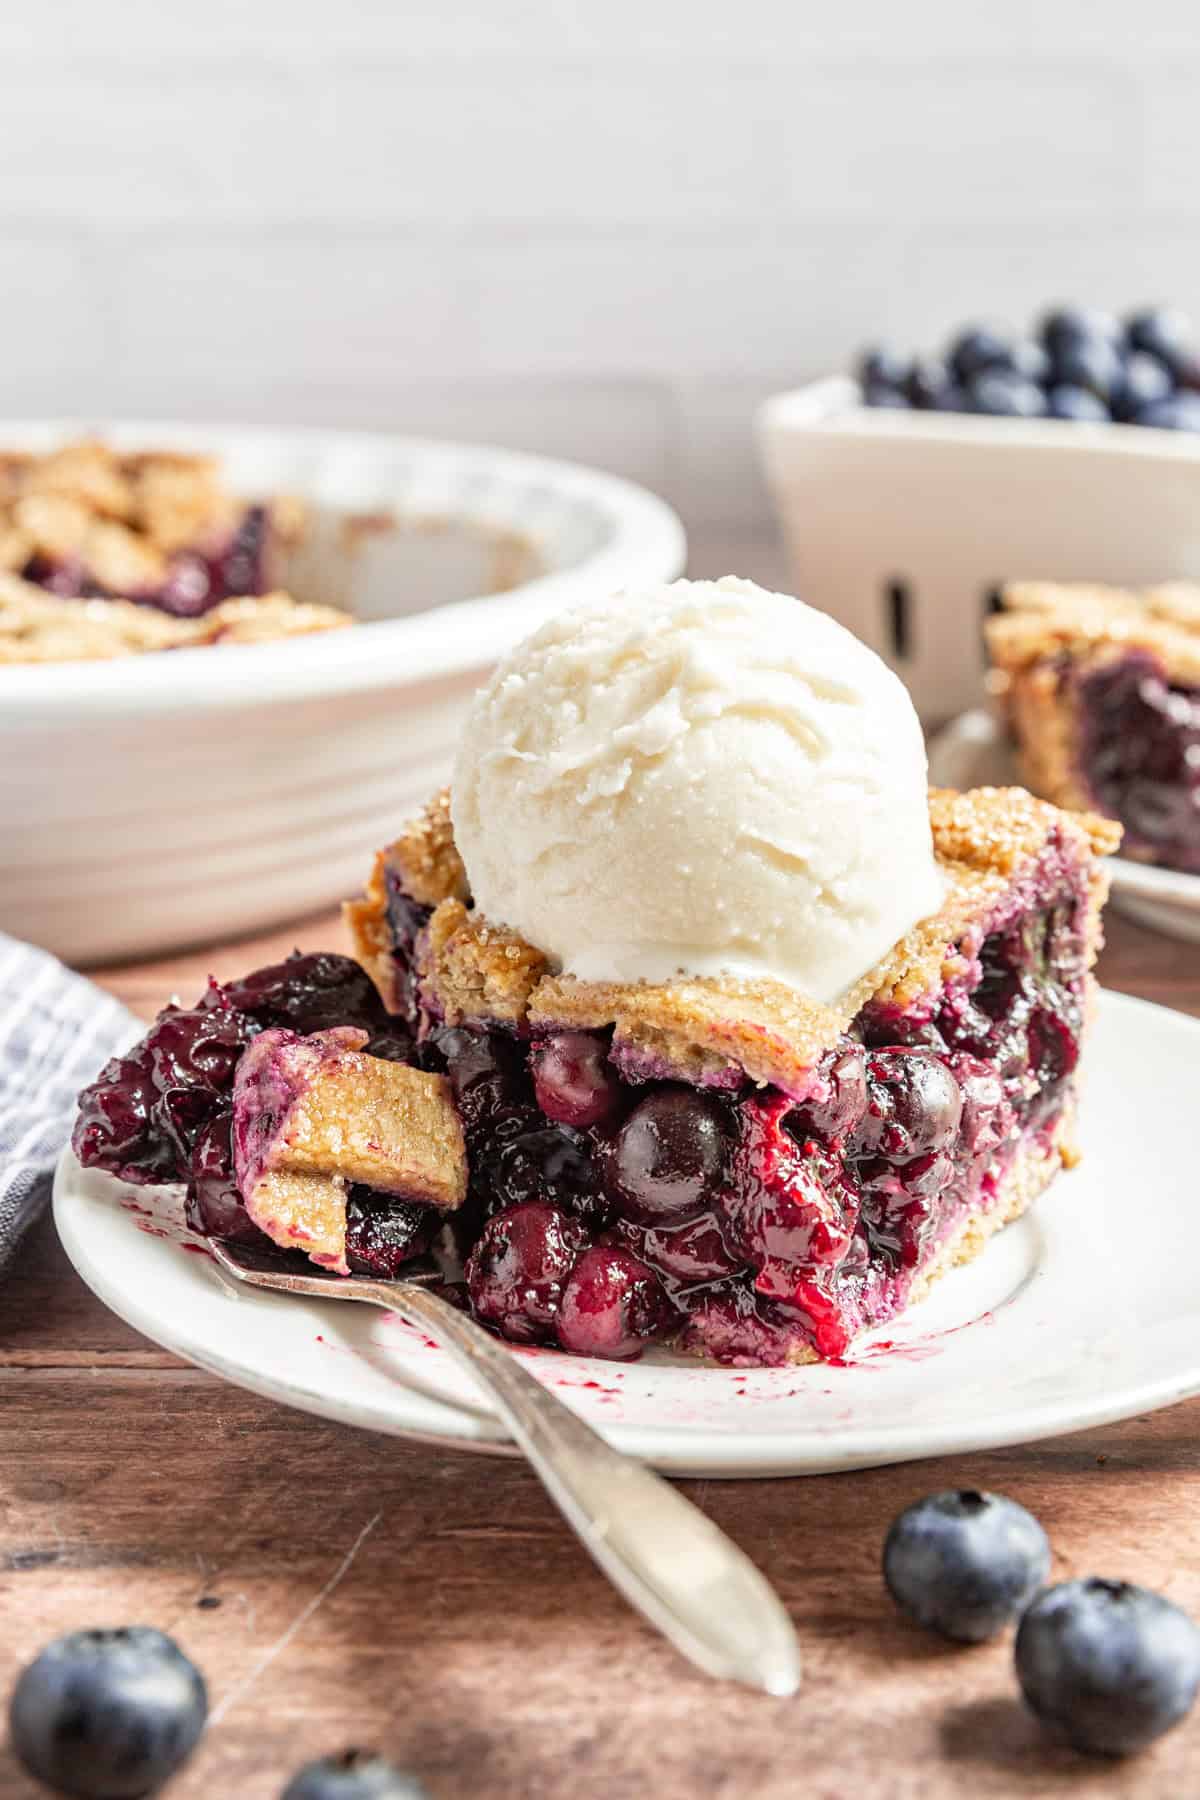
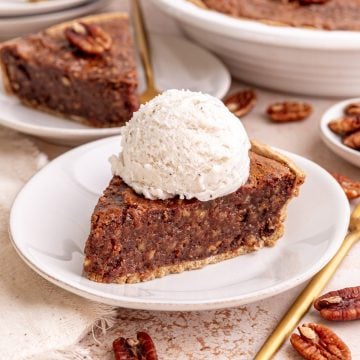
Step 13. Once completely cool, use a sharp knife to slice. Serve with ice cream if desired. Enjoy!
Serving Suggestions
A scoop of ice cream with your pie is divine!
Tips for the best Vegan Blueberry Pie
- Add lemon zest: while not necessary, if you want, you can add the zest of your lemon to the filling for an even brighter flavor
- Mash the blueberries: be sure you thoroughly mash at least 50% of the blueberries - you want to create a soupy texture so the cornstarch can work its magic
- Handling Gluten Free Vegan Pie Dough: this pie dough is surprisingly easy to work with. If it breaks apart, simply press it back together. For best results, I do recommend assembling the lattice on a sheet of parchment paper instead of over the pie.
- Vegan Egg Wash: this is the egg wash I used when I worked at a vegan bakery - the exact proportions don't matter, but soy milk and agave shouldn't be substituted for other ingredients
- Optional Sugar Topping: the entire pie is refined sugar free except for the optional topping. The crust bakes just fine without the sugar. The sugar just adds a nice texture and extra bit of sweetness to the top. It also looks so pretty!
- Cool Completely: seriously. Let the pie cool. This is actually the most difficult part of the entire recipe. But cooling the pie completely will allow the filling to set up, so the inside will stay intact when you slice it instead of falling apart
- Storing: since this pie is made from plant-based ingredients, store any leftovers covered in the refrigerator
FAQ & Expert Tips
This pie works in an 9" deep dish pie pan. The exact pie dish I used for this recipe is listed as having a 9" capacity and is 1.5" deep.
To see if your pie plate will work, measure across the top from edge to edge (don't measure the lip, just the opening). Then measure the height by placing your ruler on the outside of the dish. A standard pie dish will be 1" deep, whereas a deep dish is 1.5" to 2" deep.
To make this pie nut-free use tahini or sunflower seed butter instead of nut butter in the crust.
Tahini and sunflower seed butter have a stronger flavor than cashew or almond butter, so you may notice a more earthy flavor in the crust.
I highly recommend using fresh blueberries instead of frozen.
If you do use frozen, thaw the berries at room temperature before mixing the filling. Be sure you still mash some of the berries when mixing.
Expect to add 5-10 minutes to the baking time - you want to see the fruit bubbling in the oven. The extra baking time may cause the crust to get too brown, so watch carefully during the last 15 minutes of baking and cover the crust with aluminum foil if you see it getting too dark.
Because the pie filling is soupy I recommend making the entire lattice on parchment paper and then transferring the completed lattice to the top of the pie.
Step 1. Roll the pie dough to 10"-11" long and slice into ½" strips as noted in the recipe. It doesn't matter if the edges are uneven because they will likely be sliced off when you place the lattice on the pie.
Step 2. Lay about 7 strips vertically, spaced about ½" apart on a sheet of parchment paper. Use the longer strips in the center of the lattice and the shorter strips on the ends.
Step 3. Slide your longest remaining strip horizontally under ever other strip of the vertical pieces. Line this strip up in the middle of your lattice, since it's the longest. Avoid folding the dough completely to prevent breakage.
Step 4. Slide your next longest piece of dough on one side of the strip you did in step 3. Slide it under the opposite strips from step 3, so the this piece rests over the pieces the strip from step 3 rests under.
Step 5. Repeat step 4 with the remaining strips, weaving the strips over and under one another, sliding the shorter pieces on either slide of the longest piece you placed in the center in step 3.
This recipe is great to make the night before you want to serve it.
The pie needs to cool completely before serving, so you can let it cool overnight and serve the next day.
Store this gluten-free vegan blueberry pie covered in the fridge for up to a week.
I do not recommend freezing this pie.
Recommended Tools
- This is the pie dish I used for this recipe.
- I used a marble rolling pin, similar to this one to roll out the dough.
- Bench scraper with a ruler to measure and a pizza cutter to slice the lattice.
- Pastry brush for the egg wash.
- My favorite mixing bowls.
- And plenty of parchment paper.
Recipe Prayer
Thank you God for healthy versions of our favorite desserts. Thank you for the friends and family we get to enjoy this pie with. Amen.
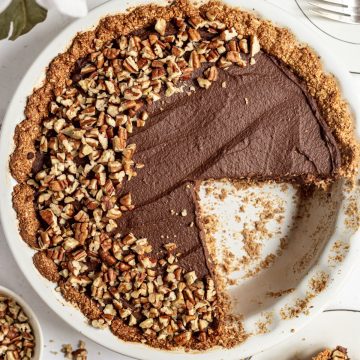
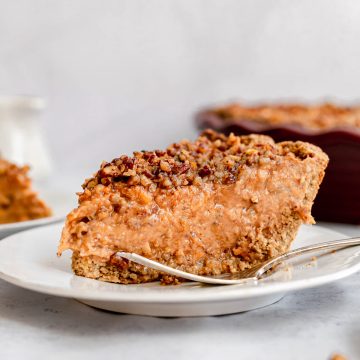
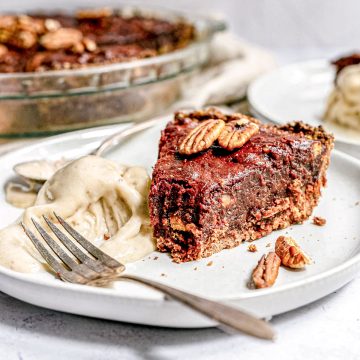
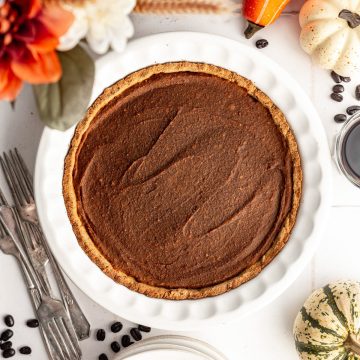
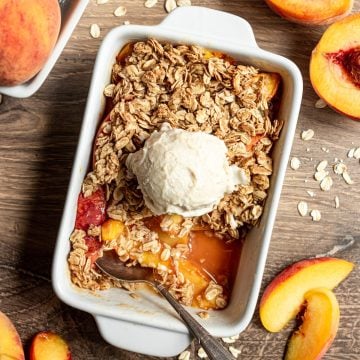
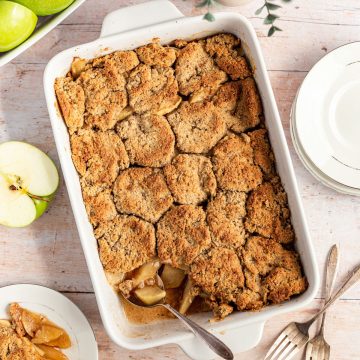
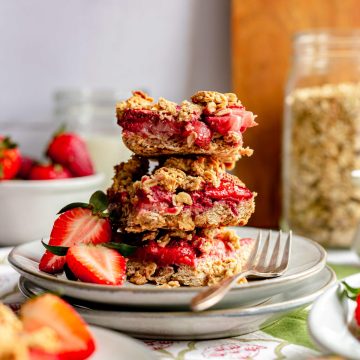
More Gluten-Free Vegan Pies
Looking for other plant-based pies? Try these:
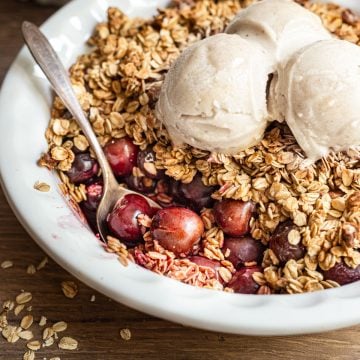
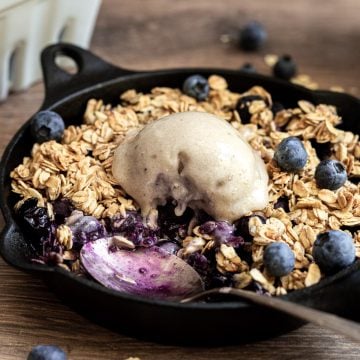
More fruit crisps, crumbles, & cobblers

Tried this recipe?
Please leave a review in the comments section below and post on Instagram tagging me @elizabeths_table. You can also stay in touch with me on social media by following me on Instagram, Pinterest, and TikTok or by subscribing to my newsletter.
📖 Recipe
Gluten-Free Vegan Blueberry Pie
Ingredients
Crust & Lattice Top
- 3 Cups Oat Flour
- 1 Teaspoon Salt
- 6 Tablespoons Nut Butter
- ¼ Cup Maple Syrup
- ½ Cup + 2 Tablespoons Water
Filling
- 6 Cups Fresh Blueberries
- ⅓ Cup Maple Syrup
- 2 Tablespoons Lemon Juice
- 1 Tablespoon Vanilla Extract
- 3 Tablespoons Cornstarch/Arrowroot
- ¼ Teaspoon Salt
- ⅛ Teaspoon Cinnamon
Topping
- 2 Tablespoons Soy Milk
- 1 Tablespoon Agave
- 2-3 Tablespoons Turbinado Cane Sugar
Instructions
- Preheat the oven to 350°F.
- Make the crust. In a large bowl whisk together the oat flour and salt. Add the nut butter and maple syrup and use a fork to incorporate. Add the water and mix until a dough forms. If the dough seems dry, add a few more tablespoons of water - the exact amount of water needed will depend on the absorbency of your oat flour and consistency of your nut butter.
- Divide the dough in half. Place the first half of the dough between two sheets of parchment paper and roll to approximately 12" wide.
- Place the dough into into a 9" deep dish pie pan. Use a knife to trim the edges straight and use any extra dough to cover any open spots. Prick several times with a fork, then bake for 10-12 minutes.
- Take the other half of the dough and place it between two sheets of parchment paper. Roll to approximately 12" wide. Then using a sharp knife or pizza dough cutter, slice into ½" long strips.
- Shape the strips into a 10"-11" lattice, with the open spaces approximately ½" apart. Press down gently on the places where the crust overlaps to seal the layers together. Set aside. *See post for detailed lattice instructions.
- Mix the filling. In a large bowl toss the filling ingredients. Use a fork or the back of a spoon to mash the blueberries until about half of them are burst. The mixture should look quite soupy.
- Pour the filling into the baked crust.
- Transfer the lattice to the top of the pie. Press the edges down to meet the crust. Then use a knife to trim off the edges.
- Make an egg wash by mixing the agave and soy milk.
- Brush the top of the pie with the egg wash then sprinkle generously with the turbinado sugar (optional).
- Bake for 50-60 minutes until the topping is golden and the inside is starting to bubble. Remove from the oven and let cool completely.
- Once completely cool, use a sharp knife to slice. Serve with ice cream if desired. Enjoy!
Nutrition
Nutrition information is an estimate.


Jo
Would this work with frozen berries?
Elizabeth
Yes! You'll want to thaw them first - if you thaw in the microwave and they have a lot of juice, I'd discard at least half of the juice. And just watch the bake time, if they aren't totally room temperature when you start the pie may need a few more minutes in the oven.